Having no instant feedback shooting film, also means I sort of get to re-experience a moment one more time. Simply because I can only look at a photo much later. And when I finally get to see the negatives and/or the scans, I get taken back to that moment.
I also get to enjoy the suspense and the surprise: “Did I get the shot how I imagined it?“ “Oh, that’s a detail I didn’t see when taking the shot!” Or – when I develop the film much later – “nice, I forgot about that frame”.
It’s always exciting taking the film off the reel after developing it, holding it up to the light and looking at this long strip of negatives. There’s always a surprise waiting.
Of course, I also get to experience the disappointment when something didn’t turn out. But that’s part of the game, and what makes it exciting in the first place.
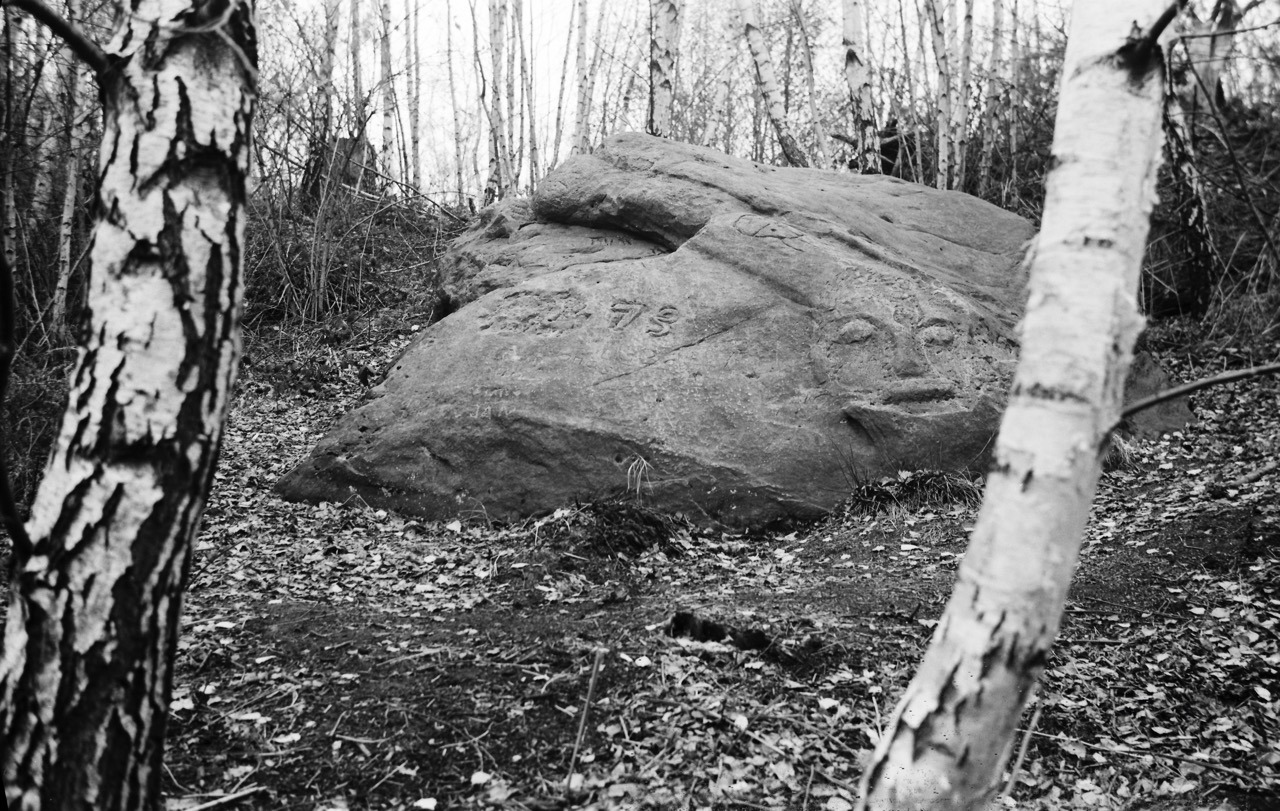
Couldn’t have guessed how this would turn out.A very spontaneous hipshot after turning around.
Recently, my Leica Mini Zoom compact camera wasn’t able to rewind a film after reaching the end of the roll. The result was that the film was stuck inside. Eventually, I managed to get it out again.
As most – if not all – electronic consumer film cameras, the Leica Mini Zoom automatically rewinds the film when it reaches its end. This time that wasn’t the case, probably because I used a bulk-loaded film. I can only guess what the exact reason was. But I suspect it was the way I taped the strip of bulk-film to the little bit of original film of a pre-used canister of HP5. And this then confused the rewind mechanism and prevented it from doing its thing.
The problem was that the take up spool was still locked and wouldn’t even let me pull off the film strip manually.
Preparations
For my attempts to rescue the film, I first put the camera into a dark bag, so it was safe to open the camera without exposing the film. I also put into the bag a drawing pin – to press in the tiny rewind button – and a developing tank – so that I could place the film directly in there after freeing it (and hence continuing to shield it from light).
I didn’t have any luck with the drawing pin and the rewind button: the camera would only pull the film further onto the take-up spool, and wouldn’t unlock the spool, either.
The solution
What was successful in the end was this: I first cut off the film from the canister. Then I pushed the film further into the camera and onto the take up spool until I only had a little bit of film left to hold on to 1. The take up spool didn’t move while doing this, so this step was loosening the tension of the film on it. Then I pulled on the film using a little bit of force as I reached the tension point again. And this forceful pulling managed to retrieve a few more centimetres of film each time2. Repeating these steps, I was able to recover more and more of the stuck film strip. And eventually the take up spool unlocked and I could simply pull off the remaining film in one last go.
Originally, I had the film taken up completely by the spool after cutting it off and pushing the rewind button again. But after pushing it a few times more, I was able to grab a short bit of film again and start with the described recovering steps. ↩︎
The pulling did make the material protest in form of a bit of cracking noise. But I (hope I) didn’t overdo it. The camera still seems to work. ↩︎
One of the biggest advantages for me when shooting film is that after taking the photo, there’s nothing to see. Neither I nor anyone else can see the photo I just took. This keeps me and everyone else in the moment.
With film, it’s clear you can’t see the image immediately. And so nobody wonders or asks. No checking possible of how something or someone looks in the photograph. It’s less intrusive compared to a camera with a screen.
That makes film perfect for me when capturing moments with family and friends: because in these settings I’m a participant first and a photographer second.
Sometimes I just feel like reading a bunch of articles on Eric Kim’s blog.
Reading my posts in the “How I took the shot” series, I realised they might come across as brag. But that’s not what I’m trying to say.
My point is rather, that in street photography there’s always a lot of luck involved – simply because for candid street shots you can’t plan anything. But also – that being patient and prepared are valuable skills to get better at as a street photographer.
By “being prepared” I mean both paying attention as well as having your camera set up correctly. There were many more unsuccessful attempts in the past where I waited and nothing interesting was happening. Or I didn’t wait long enough. Or I didn’t get the shot, because
I was not paying attention or
my settings weren’t right or
I wasn’t quick enough or
I didn’t dare to take the shot.
And that’s way worse: You can’t do anything about it when nothing interesting happens. But you can be ready, if it does. So I try to eliminate these four issues as much as I can. And then I’m sometimes even at the right place at the right time.
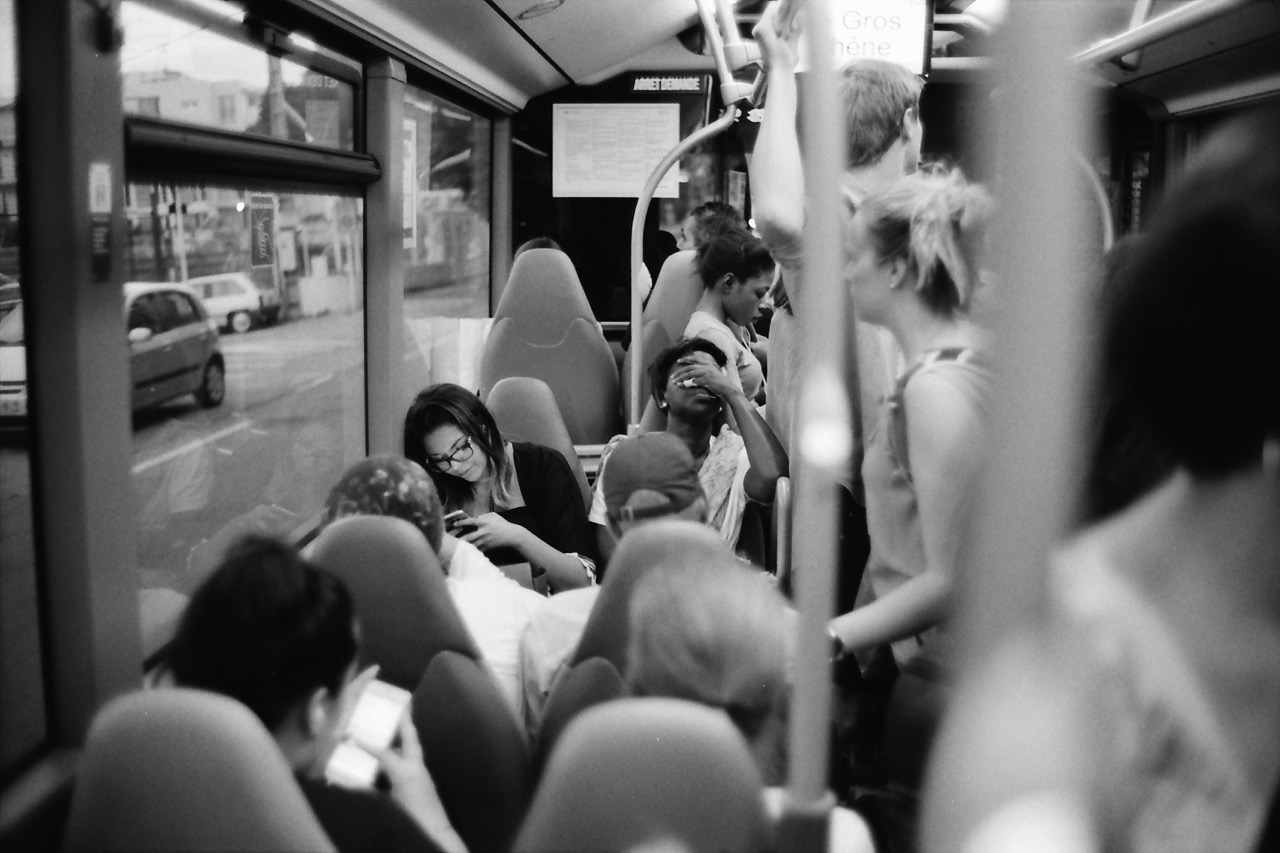
This photo was taken last June on a bus ride back from Nice to our campground. The challenge with this one was to be observant, quick and shooting in a moving vehicle while having other things to do, too.
After I got onto the bus, I took a read from my exposure meter on my iPhone to get a ballpark exposure for the bus’s interior. I preset my exposure to f/1.4 and 1/60th of a second (for my APX 400 film). I rarely shoot this lens at its maximum aperture, but this time I decided to do so, because I was on a moving bus and wanted to avoid motion blur.
I noticed this woman and I sensed she might make an interesting subject matter: she seemed tired and generally exhausted from the day. Because this was the most promising scene, I preset the focus already, too, using a person or object at the same distance1.
Then it was time to wait. It was a long bus ride.
And it took a while, but the waiting paid off. She had her hand over her eyes like this for maybe one to two seconds. Luckily I noticed. And because my Leica was around my neck, ready to shoot, I quickly raised it to my eye and took this photo.
Inside, I quietly went: “YES!”
Maybe all of this would have been trivial, if I was shooting a digital camera with auto-exposure and auto-focus. But who knows? Maybe then the auto-focus had missed or the camera wasn’t even powered on. ↩︎
I simply love how film looks. Especially the black and white variety. Both as a digital file scanned from a negative and – especially – as a gelatin silver print (which I’m not remotely creating enough of).
Admittedly, I had to get used to the 35mm look, but now it’s hard for me to go back. The low(er) resolution and graininess are no longer bugs – they’re features1. Digital looks too clean to me. And while I can still enjoy and consume and be impressed by digital photographs, and while you can also simulate the film look in post, it’s not what I’m currently interested in for my own photography2.
Film has this aesthetic that’s more detached from reality. I don’t know how to best describe it. Film not only looks great to me, it also makes me feel differently.
You better look at them on a high-resolution screen or as a print, though. ↩︎
What feels a bit silly is, that I even try to avoid shooting digitally, because whenever I take a good digital photo, I wish I had shot it on film. ↩︎
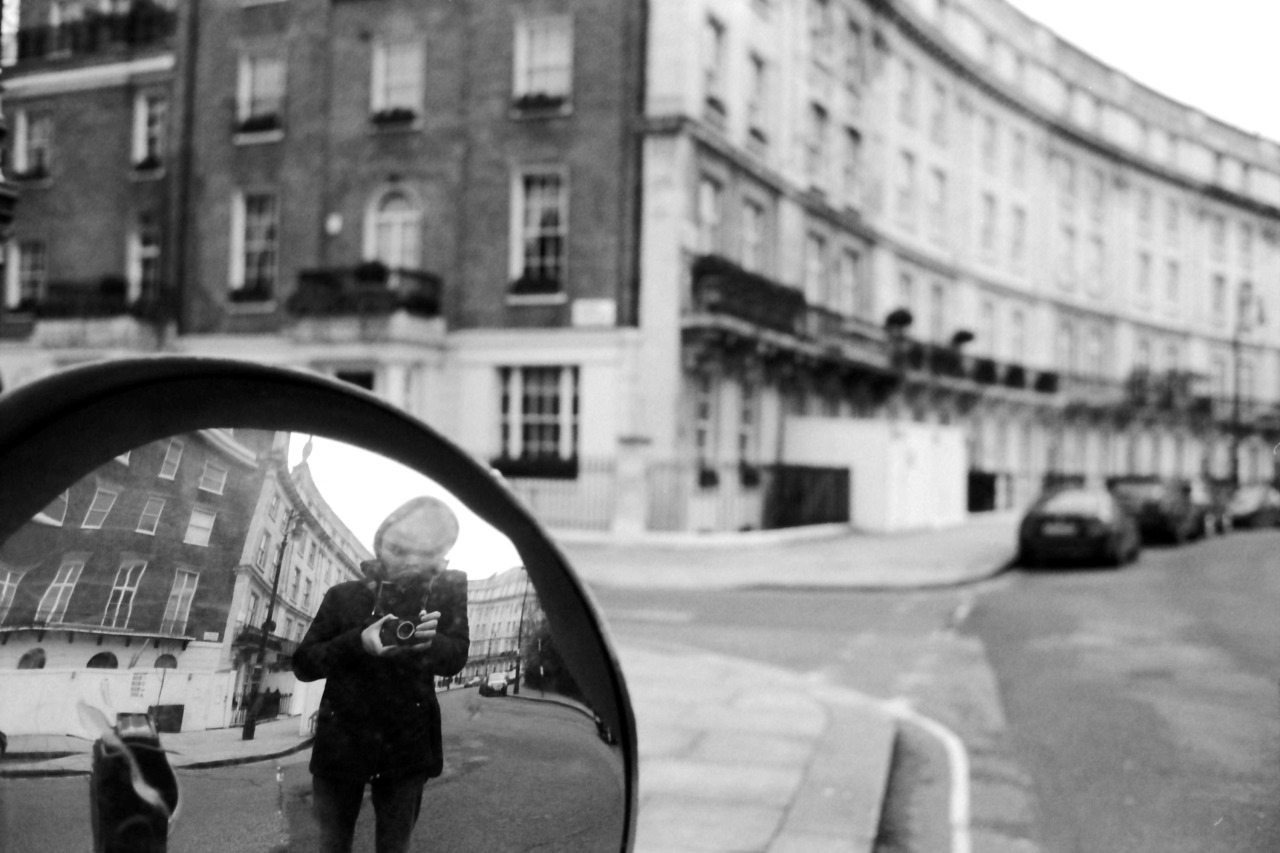
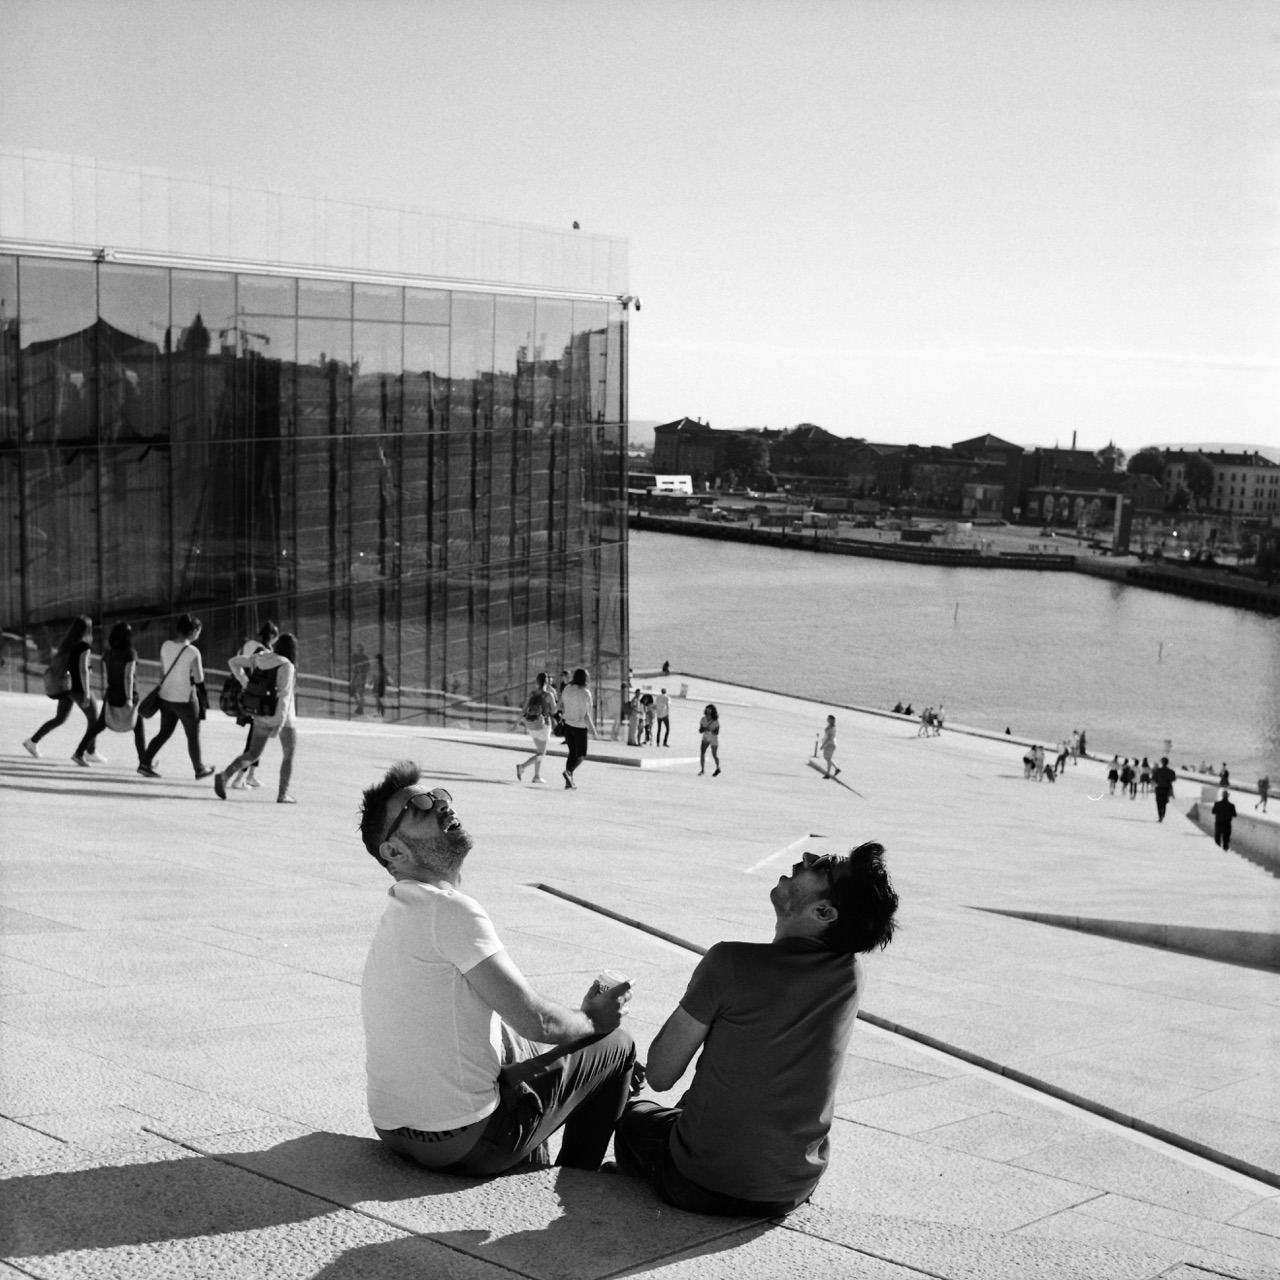
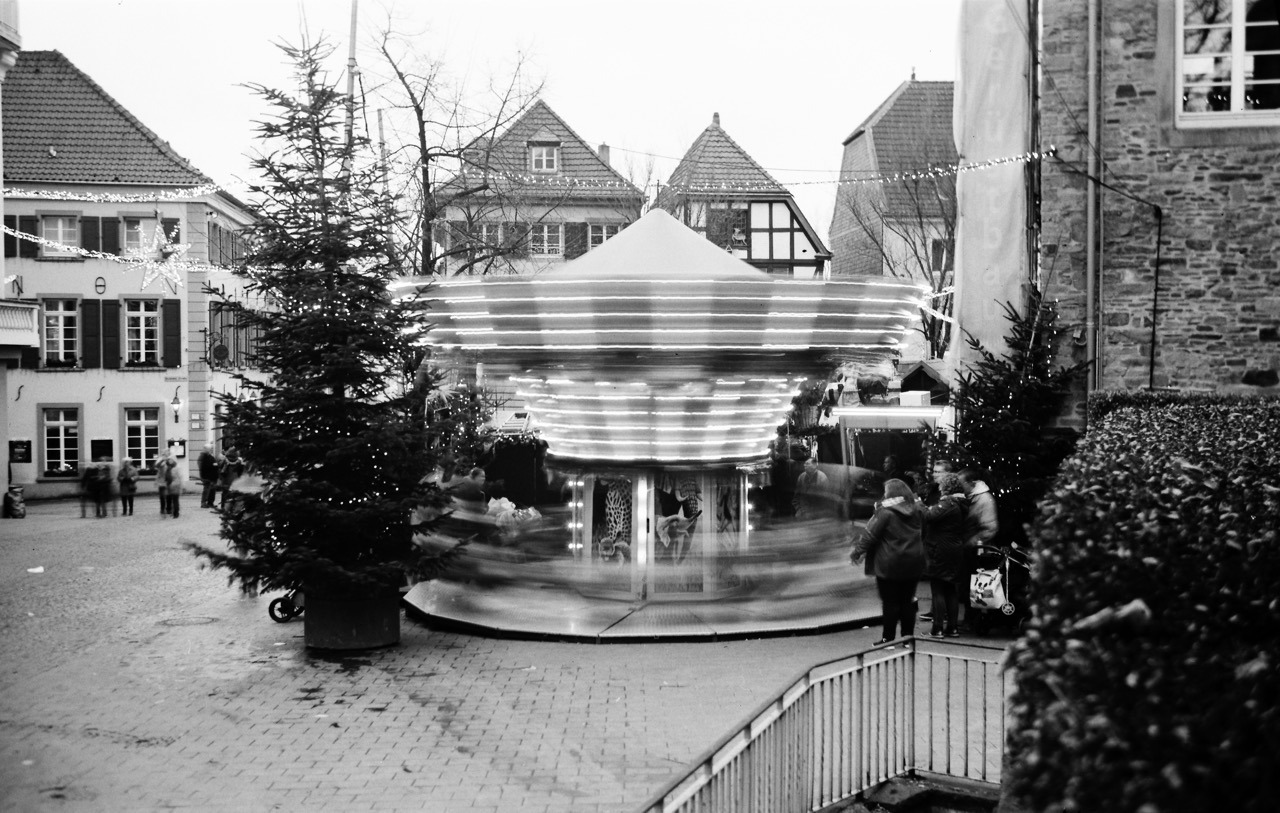
Patience and luck were responsible for getting this shot. I was standing at this very spot for approximately 1 to 2 minutes already, having the camera pointed this way, patiently looking down into it. I was waiting for some gesture or anything else interesting happening between those two. And then out of nowhere this helicopter flew over and they turned around – looking up – the way you see on the image. That they are pretty much look-alikes is just the cherry on top.
This was way better than I could have anticipated. I couldn’t quite believe it when I took the shot (and I only had one chance, as after advancing to the next frame, the scene was gone), and was thrilled when I finally got to see the negative after I developed the roll.
I just noticed Severin Koller has an updated homepage. There’s a bunch of photos I haven’t seen or forgot about. So I think I know what I’m going to do tonight.
He’s one of my favourite photographers and a major reason I’m shooting film. I especially like his street and documentary work, but his portraits are wonderful, too. And his other stuff as well. Go check it out!
If you like what you see, I encourage you to check out his blog, which is one of the best sites on the internet. Just wonderful – and more personal – street and documentary photographs. He’s got such a great eye for moments – from subtle gestures to more obvious juxtapositions – and an incredible skill to capture them. And you can basically follow his life for the last decade.
Here’s a quick tip for getting two rolls of 120 format film onto a single plastic development reel consitently and safely (i.e. wihout having the films overlap inside the tank):
Warm up the reel before winding on the films.
The reel should be dry to begin with. To warm it up, I simply put it out in the sun for a couple of minutes or use a hair dryer for a few seconds.
I’ve read this tip on a forum somewhere, and I haven’t had issues since I started following it.
Detailed instructions
When you have warmed up the reel, put everything in the darkbag (or darkroom) and start loading the first roll as you normally would.
Once you’ve ratcheted it on, use your fingers (as the ratcheting won’t work once the film is on completely) to keep winding it on until it hits the inner end of the reel. (Since I can’t handle the film on its side for this, I do touch the film directly.) Because the reel is dry and warm, this should work without resistance from the material. If you feel you have to force it, there’s a good chance you won’t get the film in completely. In this case, I would start from scratch or bite the bullet, and simply develop only one roll this time around.
Once the first roll is in, load the second roll as you did the first. Both ratcheting or simply pushing the film on do work in my experience. Make sure to not wind it in too far. There’s not much extra space on these reels, so stop winding as soon as the second one is on completely.
That’s it! Now you can start developing.
What I’m using
I am using a Kaiser Developing Tank with plastic reels for my film developing, which can hold two reels with one 35mm film each, or a single, expanded reel to hold medium format film. The only way to develop more than one 120 roll in a tank like this, is to spool two onto a single reel. And with it comes the risk of having the films overlap.
If you’re using a different tank system, this tip should also apply as long as the reels are plastic.
I tried loading more than one film several times before following this tip. It sometimes worked, and sometimes didn’t. Which meant I had films overlapping (quite substantially at times) and I lost quite a few negatives, because they came out undeveloped or only partially developed.
This one was on the verge of being lost.Most lost frames look much worse than this, where you can’t even figure out what was being photographed. And most frames I didn’t even scan.
Bonus tips for developing 120 film
Peel off half of the tape that holds each film roll together before placing it into the darkbag. This makes it easier to open the roll in the dark.
Always use enough developer (probably more than it says in the instructions for 120 film). Without a second reel to hold everything in place, there’s a good chance it’ll slide up a little during agitation, and will no longer be completely covered by the developer.
An example where I didn’t have enough developer in the tank. The shape of the undeveloped parts on the right comes from all the air bubbles that accumulate around the developer surface.
Find the 35mm/full-frame equivalent to a focal length in different sensor- or film-format.
Between Christmas and New Year’s – or “between ze days” as we say in Germany – I worked on a little project: Focal Length Equivalents, a website that let’s you look up focal lengths of different film- or sensor-formats and find its equivalent to the 35mm/full-frame format.
Here’s some more explanation from that new site:
Like a lot of photographers, you might be familiar with focal lengths in the 35mm/full-frame image format and what field of view that focal length represents (24 mm = wide angle, 50 mm = “normal” etc.). Different formats, however, require different focal length lenses to produce an equivalent field of view.
With this site, you can look up these focal lengths and their 35mm-equivalents.
For example, when I bought my 6x9 camera, I wanted to know what its lens’ 110 mm equivalent field of view is in the 35mm format – because that’s the format I’m most familiar with. And when looking up information like this I always end up looking through some old forum threads, if I don’t want to calculate it myself (which I never did).
That’s why I built this little utility, which calculates it for me and saves me the search. Check it out!
The UI
The UI is a table that dynamically updates as you move a slider. That slider is an HTML input element of type range.
My idea was to create a super-simple interface that’s easy to use on both mobile and desktop – i.e. with a touch interface as well as a mouse/trackpad. There’s nothing to type into a field and no button to push to recalculate. Simply move the slider.
Another benefit of this is, that you are always comparing all formats at once. No need to select or otherwise “activate” a specific format. You simply look at the row of the format that interests you to compare (tip: you can tap/click on a row to highlight it for even easier visual comparison).
Drawbacks
A drawback of this UI is, that the slider is somewhat fiddly to operate. And it’s a not very precise UI element, either. I might be able to make it less fiddly by creating a custom design for the slider. But the imprecision will always be there I assume, especially on smaller screens where the input’s values are spread across less horizontal space. I limited the focal lengths you can compare to mitigate this issue at least a little – but this is yet another drawback itself.
This is the MVP
This version is a MVP – a Minimum Viable Product. There’s quite a few things I have in mind to improve the UI or better communicate each format’s dimensions (which are the base for the calculation), and also add more formats. But I think it’s already quite useful, and that’s why I’m making it public right now.
Back in October I impulse-bought my first fold-out 6x9 camera at the Photobörse Ratingen (a kind of cameras-only flea market and trade show).
It’s some Voigtländer Bessa with a 110 mm lens and a maximum aperture of f/4.5:
I’ve fancied having a camera like this for a while now. Because I imagine them being great for landscapes: they are compact, relatively light and pretty robust – which is good when you’re hiking. They have an aspect ratio well suited to landscapes and the negative size is the largest medium format has to offer (panoramic cameras aside).
And my demands for its controls are not very high, either. I only plan to use it outdoors at daylight, which means that
the aperture doesn’t have to be large, nor has the lens to be a great performer wide open,
the exposure has to be set only once in a while, so controls don’t have to be super-convenient, and
I don’t need to focus accurately, because for the most part, I will set it to infinity and forget about it.
That’s why a cheap model like this one will do.
Last month I finally went out with a roll of Fomapan 100 to see if it’s working properly. And it is: No light leaks, most shutter speeds seem to be accurate, the aperture works, focus works, lens works. It’s not very nice at f/4.5, but much better at f/5.6 and from f/8 and above seems to render perfectly fine. Which I’m happy with.
I’m looking forward to trying this out on a proper hike, but for now, here are a few shots from that test-run:
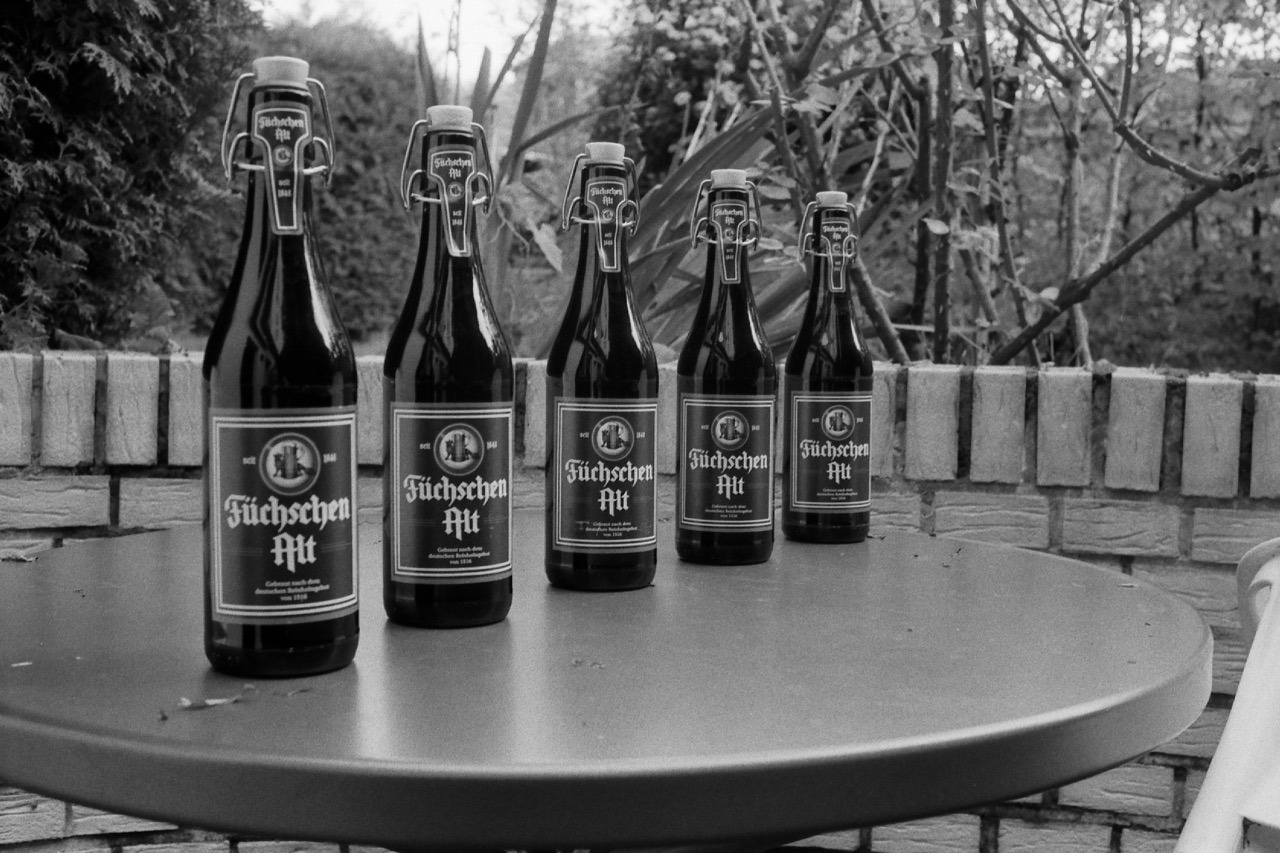
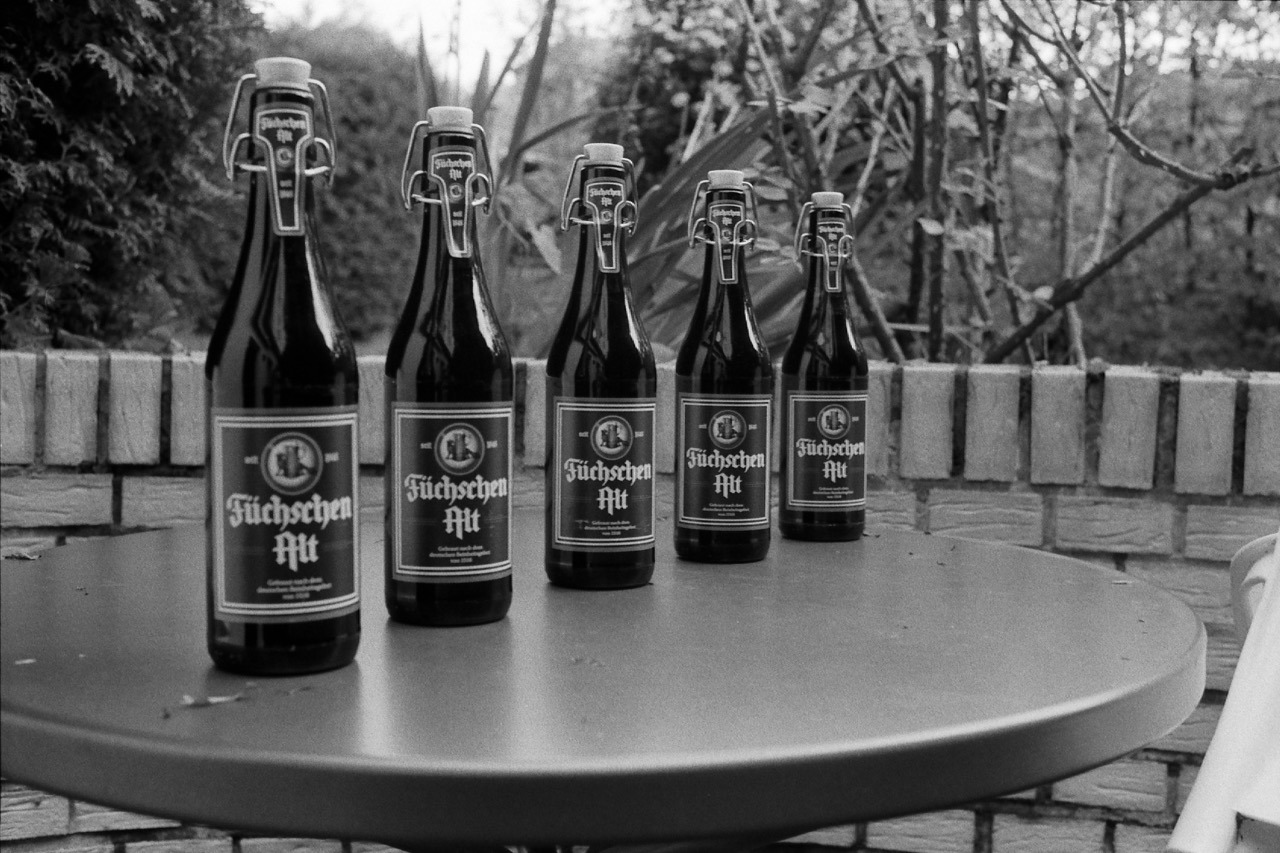
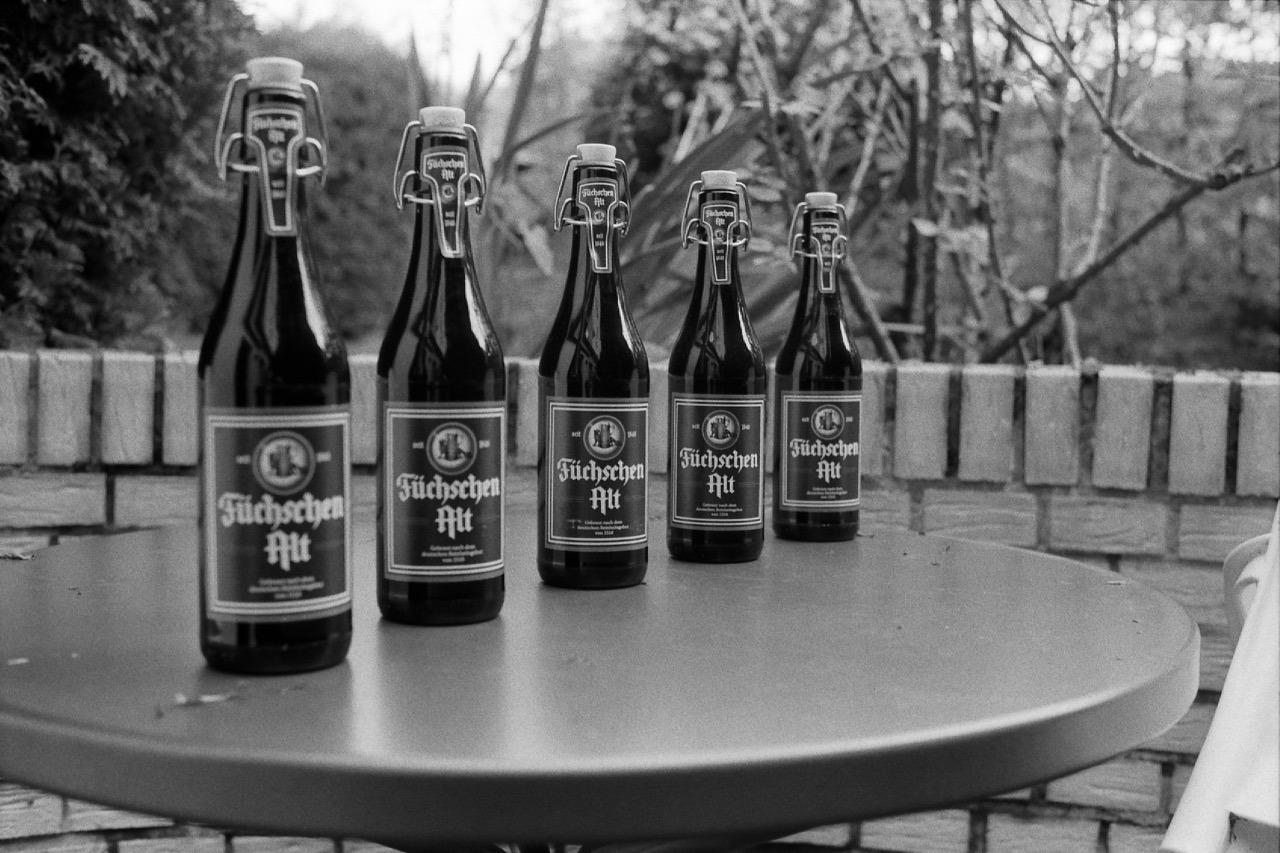
After I acquired my new camera and lens, I set up a quick test subject in the backyard to test the camera’s shutter speeds as well as the lens’ different apertures in a controlled environment.
And I figured these test photos are worth sharing, as it gives an idea of how this lens renders on film at its various settings.
Camera on tripod positioned approximately 1 meter from the focus point.
The focus point is pretty much in the middle of the frame (just right to the center of the bottle in the middle).
Film: Kentmere 400, developed in Rodinal.
Scanner: Canon CanoScan 9000F Mark II (scanned using Silverfast SE software).
Adjustments: contrast raised and some sharpening applied in Apple Photos (all photos to the same amounts).
Anyhow, here they are: the photos showing the test scene at the eight different major aperture stops of the Voigtländer Nokton Classic 35mm 1.4 Multicoated lens for the Leica M mount. (Zoom in or open the image in a new window/tab for slightly more resolution.)
f16 – 1/8s
f11 – 1/15s
f8 – 1/30s
f5.6 – 1/60s
f4 – 1/125s
f2.8 – 1/250s
f2 – 1/500s
f1.4 – 1/1000s
Matt Stuart gives lots of advice while explaining some of his pictures during a gallery opening.
German camera manufacturer Leica has announced a new M digital rangefinder that has no LCD panel. The Leica M-D (Typ 262) will be almost exactly the same as the existing M (Typ 262) but without a rear screen for reviewing images and working the menu. The company says it has produced a camera with only the ‘essentials of photography’, or ‘Das Wescentliche’, and that it will help photographers concentrate on the important elements of image making rather than getting distracted with the camera functions.
Now, this is an interesting digital camera! Seriously!
I currently really enjoy shooting film, and a huge appeal is the simplicity and enjoyment of shooting these old cameras. No screens. No menus. No chimping. Just the essential buttons and dials.
If Leica wasn’t so expensive, I’d be seriously tempted. Why can’t Fuji make such a camera?