I know some people simply use water as a stop bath. And I was contemplating trying this approach. But I often read it’s not ideal, because it’ll exhaust the fixer more quickly. And since I now found out about the vinegar approach, I think I’m going to try that instead.
When you miscount and think you have bulk loaded one roll more than you actually have, you run into some problems. When you think, ‘ok, yes, that last roll often has a few more frames on it’ and keep winding but it doesn’t stop even at a frame count of fifty, there has to be something wrong. This just happened to me. And now I have one very very full canister with 50+ frames and one with around 30, which could have easily used another 10 more frames.
One should probably always stop when the canister is full enough. At the worst you’ll have so little film left unspooled, it doesn’t make sense for another roll. But I think that’s better than having to deal with a fat 50-frame roll, where I’m unsure, if it’ll be usable in any camera without issues or whether it’ll fit in the developing tank. I’ll probably just waste a few centimetres and trim that one down to 40+ exposures before using it.
To reduce my reliance on an external light meter, most times I guess and set my exposure before taking a meter reading. This makes me assess the available light first and makes think about what the exposure might be. When – or even if – I then take a meter reading, I’ll correct my aperture and shutter speed settings, if need be.
I found this to be a very effective way to get better at guessing exposure. Outdoors, I use the sunny 16 rule as my guidance, of course. For indoors, I mainly rely on experience.
There’s something very rewarding about being able to operate an all-manual film camera and produce useable images with it. You have to get the exposure right, the timing, the focus, the framing; you often need a steady hand in low light; and developing the film needs to be done correctly, too.
I do use a light meter app on my phone to help me with setting the exposure, though, but that’s about it for additional technical help. A meter simply makes me more confident in dialling in my exposure. But – to be honest – more often than not, I guess (or even know) the exposure.
And I could shoot more automatic film cameras to help me out. But I prefer those manual mechanical ones. This might be making it unnecessarily hard for myself, but that’s exactly the challenge I like so much. But just because I’m using these manual tools, doesn’t mean I’m automatically taking better pictures, of course.
And to end this not on a more modest note: once you start shooting film and use manual cameras – while at first indeed challenging – you’ll notice it’s actually not that hard. I got used to this way of shooting and now prefer it over using all sorts of automatics. It makes for a more controlled, quicker, and more enjoyable experience for me. And it’s a more calm way of shooting, without many buttons to push or looking at flashing lights or screens.
But still: it’s a nice feeling having captured an image where I was 100% responsible for all the technical settings and processes.
My little Focal Length Equivalents tool now features “automatic dark mode” on supporting operating systems and browsers. Meaning, when you have your operating system set to prefer a “dark” styling – like macOS Mojave offers for example – and you are using a compatible browser, the page will show with a dark background and bright text. If your operating system is set to something else, it will show the default white background and black text.
Unlike for my blog, this solution uses CSS only. I simply put the required media query at the end of the CSS file(s) and by doing so, overwriting existing default colours with the ones used for dark mode.
/* AT THE END OF THE CSS FILE. DEFAULT STYLING ABOVE THIS MEDIA QUERY */
@media (prefers-color-scheme: dark) {
  body {
    color: #DDD;
    background-color: #222;
  }

  a { color: #88F; }
  a:visited { color: #AAF; }

  body > footer {
    border-top-color: white;
  }
  /* ETC ETC */
}
Overwriting the colours like this could become unmaintainable in a more complex setup, but for this little page, this works just fine.
Since I started bulk loading my own film, I’ve collected a few notes and tips on how to make it all work smoothly and consistently. Plus, I have some extra tips on using those rolls in a Leica M.
To understand these tips, you’ll already have to know how to operate your daylight film loader. If you don’t, here’s a video explaining it in great detail using a Watson loader, which is very similar to mine: How To: Bulk Loading Film.
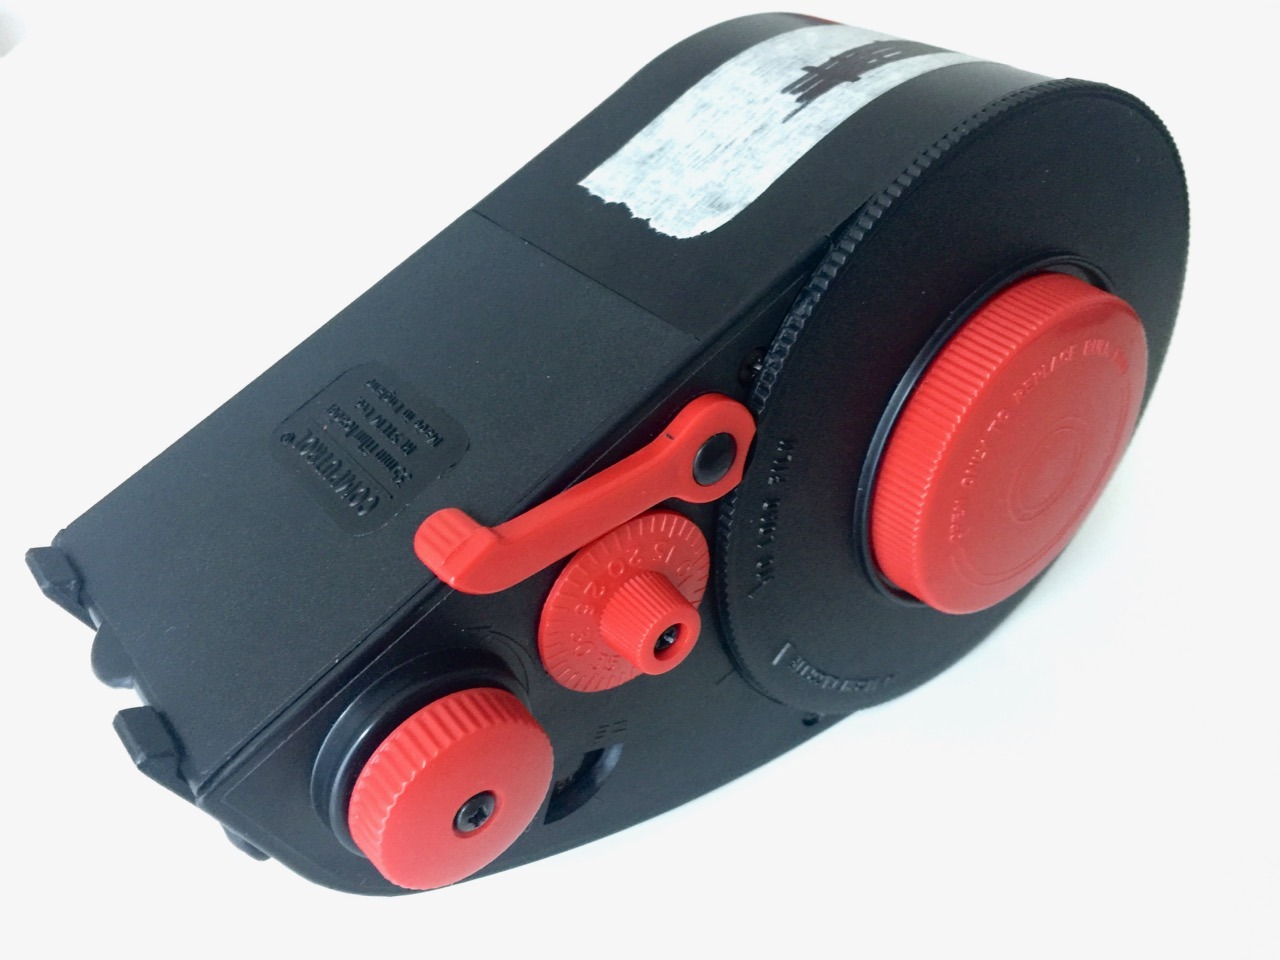
My Computrol bulk film loader
I’m using a Computrol 35mm bulk film loader. So that’s what these tips refer to. If you’re using a different style of loader, some might still apply, but some might not.
Let’s get started:
Canister loading tips
Currently, I’m using standard, already used 35mm film canisters and roll the bulk film onto them. For this, I tape the film from the bulk roll to the little bit remaining film that’s still attached to the canister. Here’s a video that shows how this works: Bulk Load Film Tutorial.
So, first some tips for inserting the film cassette and getting everything ready:
Make sure you tape on the film straight. Otherwise it won’t wind on nicely.
Before inserting it into the loader, manually wind in the taped part, so the Tesa/Scotch tape won’t get stuck on the outside of the canister once you start using the crank.
If you do run into problems winding on the film, don’t force it. It should work without much resistance. If that’s not the case, better start over.
Before starting to spool on, don’t forget to open the gate, so the film doesn’t get scratched and you can effortlessly turn the crank.
If you’re doing this for the first time – or haven’t done it for a while – load your film in a dim environment. Should you then have an accidental light leak, it won’t be as severe.
Winding tip: Load for one complete counter run
If you’re aiming for getting eighteen 36-exposure rolls out of your 30.5 meters (100 ft) of film, make sure you wind on a full counter run, which is 40 “clicks” or frames. So, before loading a new roll, I set my counter to “0” and wind on 40 clicks, until it’s back at “0” (which is equal to “40”).
The frame counter
With this method, I always get 18 rolls out of the 30.5 meters and each roll has at least 36 exposures on them. Plus, the counter is already reset for the next roll.
Canister unloading tips
When you wound on you film, it’s time to get the freshly loaded canister out of the loader.
Take out the spool before cutting it loose. This way it’s much easier to cut the film with scissors.
Cut the film relatively close to the canister. I usually cut after two sprockets. I found there’s already enough film in the canister for my 36+ exposures. No need to have even more on that roll. (Plus, then there’s already enough film sticking out of the loader for the next roll.)
Put some bright tape on the loader and use a pen to keep track of how many rolls you’ve already loaded. I found the built-in “meters/feet left” counter unreliable and tedious.
Tips for using bulk loaded film in a Leica M
When you shoot a bulk-loaded roll, you can’t simply shoot it until you can’t advance to the next frame any more. Because you would lose a frame or so at the end, since during the loading process both ends of the roll were exposed to light. So, you need to pay attention towards the end of the roll, to know when the film is full.
Here’s what I do to make sure I don’t lose any frames with my M:
Before inserting the film, make sure the shutter is cocked or has just been fired. That way, each time you wind on a fresh film, the travel will be the same for the first one to two advances.
Waste the first frame.
Start shooting at frame count “0”. (Now, to be 100% sure you get a full frame on this first shot, I’d waste one more and start at “1”.)
Shoot until and including frame “38”. Once the counter hits “39”, the film is full. (Sometimes that’s not the case and you get one more shot out of the roll, though. Which happens to me accidentally, when I don’t pay attention.)
Shooting my M4-2 from frame “0” to “38” indeed gives me 39 fully exposed frames most times. Occasionally, the first or last frame are incomplete. But it’s recently always been at least 38 frames.
Today, Zoe and I made a bike ride to a more far away playground. She likes playgrounds. And bike rides. Whenever she sees my bike, she wants to climb into her seat and put her little helmet on.
I’ve discovered bulk loading of film for myself. It’s like rolling your own cigarettes – but for film. I think. Because I never smoked.
Anyhow, I do it to save money. Others do it to be able to fill canisters with a different number of frames each roll. But I don’t do that.
Rolling your own is more time consuming than simply buying a pre-made 35mm canister. Plus you need to factor in the costs – albeit small – for the machine you need to be able to load the film in the first place. So, I would only recommend it to people who shoot film frequently.
But if you do, it’s well worth it. From where I buy, one roll of HP5 bulk-loaded is approximately €4 instead of €5.401 when bought standard. Furthermore I get to shoot cheaper films even cheaper. I recently shot a lot of APX 400. Bulk loading this brings its price per roll down from €4.50 to approximately €2.60. And that’s a nice price for a roll of a good black and white film.
A 10-pack of HP5 is currently €54.60. A 30.5 meter bulk film roll is ~€73, which I get 18 36-exposure films out of. ↩︎
This blog has had a dark mode for a while now. Toggling it on and off could be done manually, and the selected preference would be stored in your browser for the next time you return.
I don’t know, if any other operating systems other than macOS Mojave have a “Dark Mode” preference. But, if you happen to run Mojave and use the Safari 12.1 Beta or Technology Preview, you can try this out yourself. But here’s a little GIF of what it looks like:
The whole usability around this feature is not ideal currently. For example, I should probably have a 3-way switch – On, Off, Auto – instead of a simple checkbox toggle. And I should make an “Auto” setting work without JavaScript. But I didn’t have the time for this tonight, and so this will be a little project for another time.
I recently wrote about why I don’t want to upgrade my Mac right now. But last Saturday, it stopped working again due to that graphics card issue and is in for repair once more. So, I had to buy a new one, because I couldn’t afford to go without my computer for close to two weeks. And I also wanted something reliable again.
I decided on a current 13-inch MacBook Pro, with a 2.3 GHz Quad-Core i5, 16 GB of RAM, an 1 TB SSD, the Touch Bar and a keyboard with German layout.
I bought it refurbished, because that was the only option to get something fitting within two days. Plus, the price was nice. Which luckily means, concern No.2 from my previous post is lessened. But the other points are still a concern for me.
Anyhow, here are some initial observations:
The new high-resolution display is absolutely gorgeous (and True-Tone seems nice as well)!
The trackpad is super nice. Annoyingly, though, I can’t trigger drag-and-drop reliably.
The Touch Bar is not bad. I actually like some features. But while the software Esc-key somewhat works so far, it’s not ideal, as I sometimes either don’t hit it, or hit it accidentally. But maybe I simply need to get used to it more.
Touch ID is neat.
The whole computer looks and feels great.
Only 1.37 kilograms for such a powerful machine is absolutely fantastic.
The keyboard is very nice to type on. But I really hope it’ll keep working.
The German keyboard layout is driving me nuts! I’m slowly re-adjusting, but it’s still pretty frustrating to use.
On the one hand, upgrading to a model that’s more than seven years younger feels amazing. On the other hand, it’s simply another computer I can do my work with again. But no matter how I look at it, I’m very happy so far with this new machine.
This year, I missed out on the Düsseldorf Photo weekend. Usually I go, but this time I simply couldn’t find the time. The good things is, though, that most of the exhibitions run for longer. So, maybe I manage to visit one or two in the next couple of weeks – especially those that are at a venue I come by more or less frequently. Here are some that interest me:
Do I really have to write about Ikea again? Well, yes! Because this week I learned that Ikea has its own standards for things.
Their kitchen furniture for example, has a depth that is chosen so that you probably want to buy their worktops, too. Because a standard 60-centimetre top – the width you can buy in most other places – is too short. But their non-standard 63.5-cm-worktop fits just right.
Another example is their sink plumbing. When asking about plumbing/connecting possibilities, we were told that the water trap and all those other pieces only work with Ikea sinks. Both the sink and their pipes/connectors don’t work well with other standard parts you’d need for more custom plumbing.
For simpler logistics, our preferred solution was to get everything from Ikea – and we did. But it’s still interesting to learn that they do these little shenanigans. Which is not surprising, I guess.
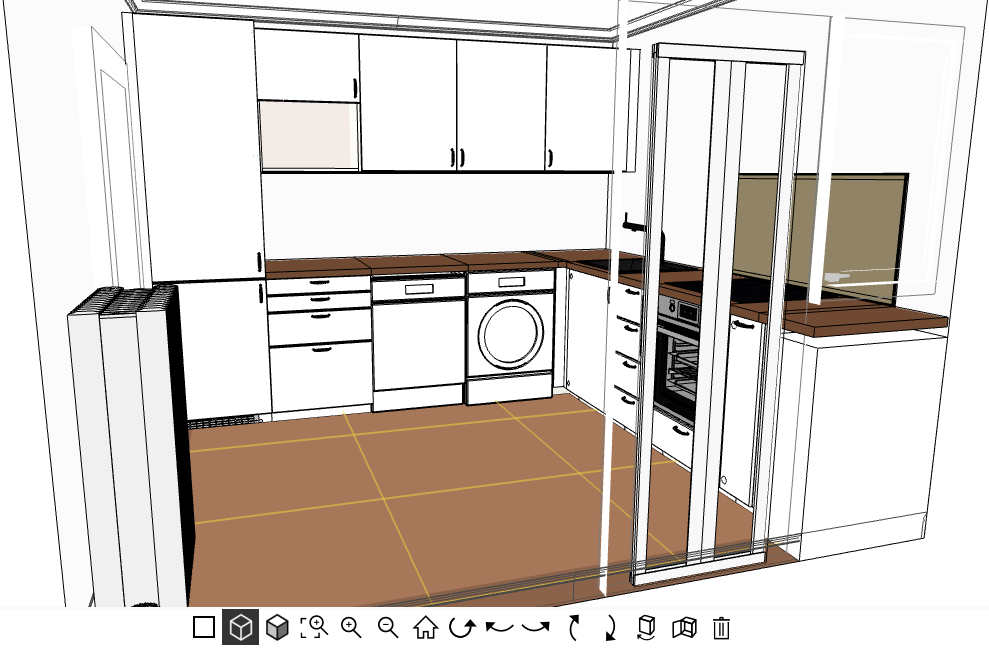
But to end on a more positive note: the woman helping us finalising the kitchen was very friendly and her advice super helpful. She pointed out errors, made good suggestions and never tried to up-sell.
So, here’s what the final design looks like:
The parts will be delivered tomorrow and we plan to assemble and set it up the following weekend.