I’ve been working on this blog’s design again. The biggest change is that it’s now responsive – meaning it adapts to different screen sizes, from big to small. When you are visiting this site from your smartphone, you used to be seeing Tumblr’s default mobile design – now you’ll see my own.
Further amendments:
It’s now a black & white theme.
No more Tumblr Photoset rendering. I simply render all images full-size and inline, one after another.
It supports iOS’ “Dynamic Type” feature. That means, this theme will adjust its font size based on your iOS device’s text size settings (in case you use this feature).
Of course, it’s not perfect in every corner of the site. But I’m pretty happy with it for now.
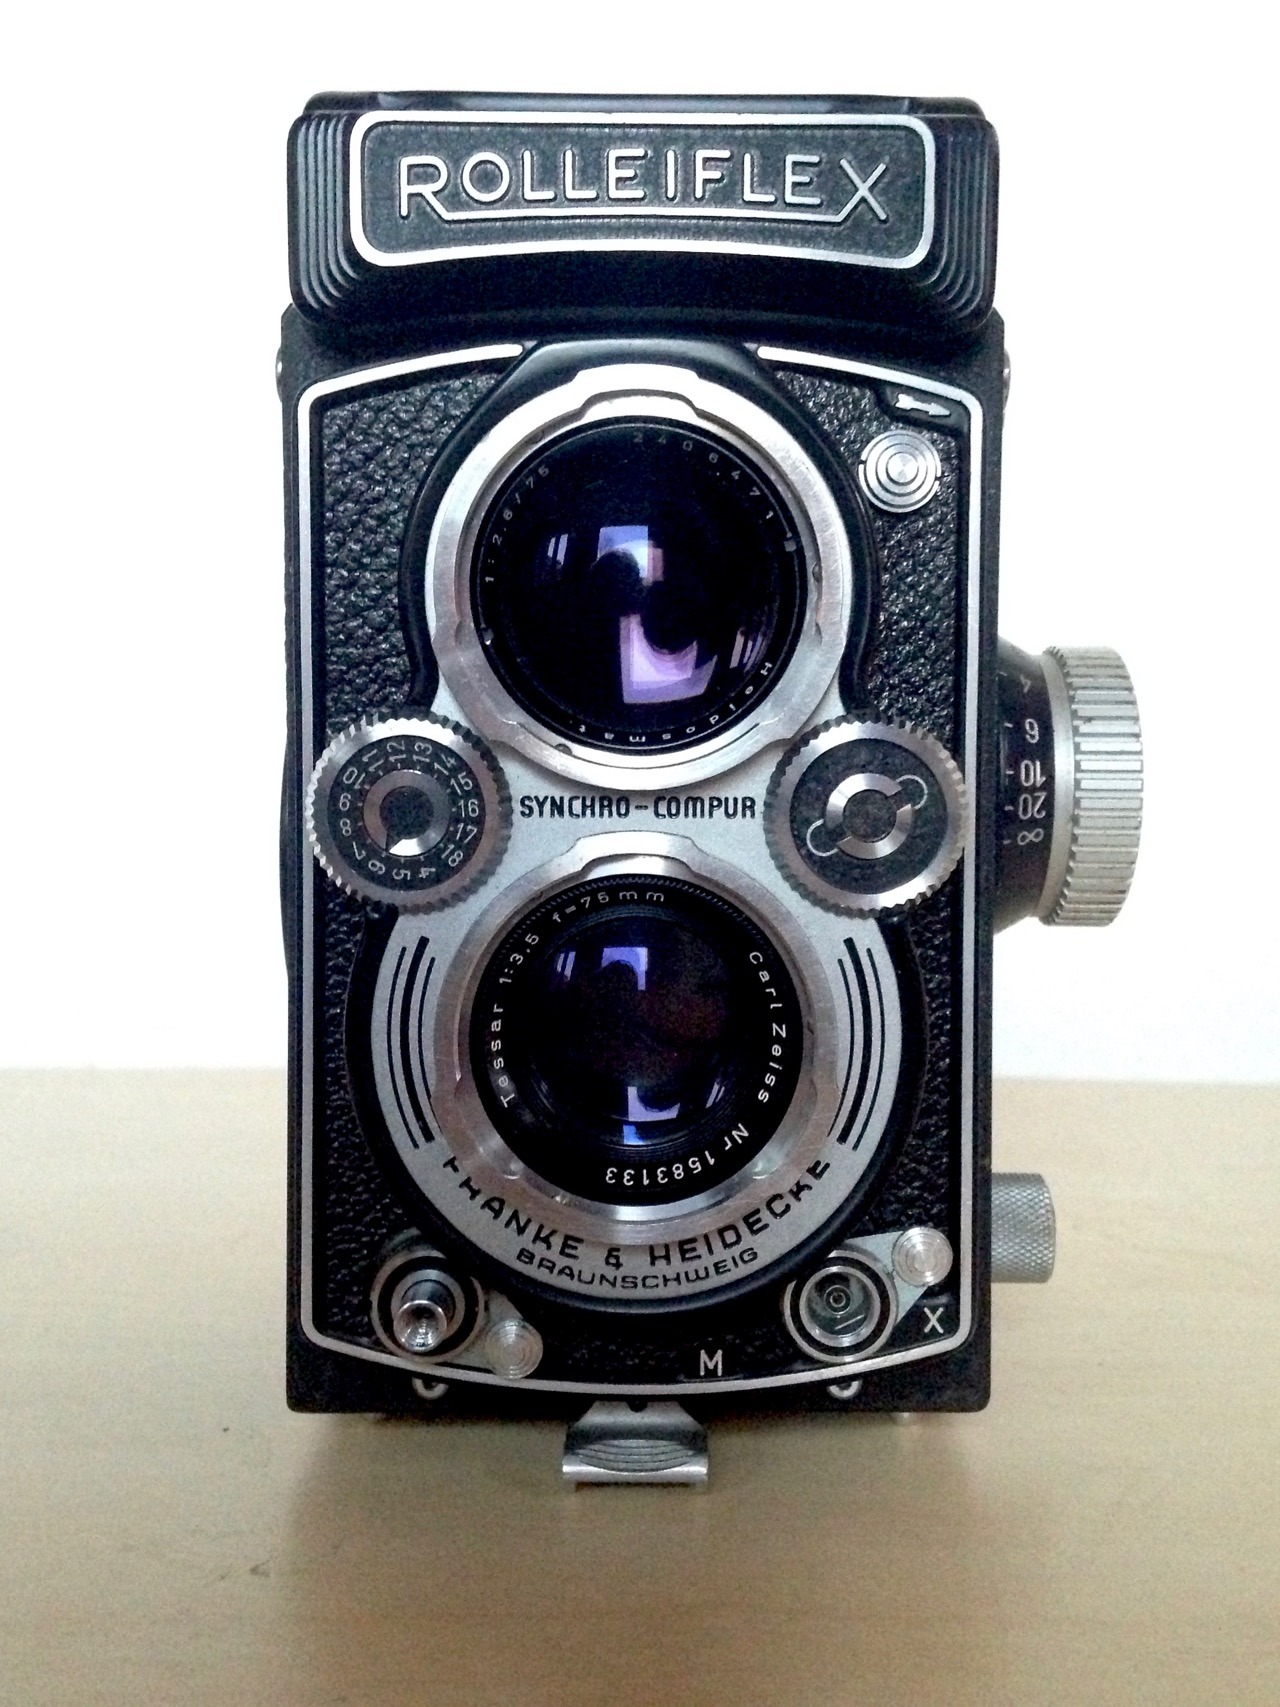
So, it was my birthday in March. And with a €100 voucher for Foto Leistenschneider, which Nicole gave me as a present, it was an easy choice what to spoil myself with this year: a beautiful Rolleiflex 3.5B (also called the MX-EVS).
Leistenschneider had a few used Rolleiflexes on sale and I eventually settled on the 3.5B for €270. This one has the 75mm f/3.5 Tessar lens.
I was enjoying my Lomo LubitelTLR very much, and I knew I wanted a TLR camera with a more high quality lens and easier operation eventually. And the Rolleis are just amazing for that. Apart from a little sticky shutter button, this one seems to work flawlessly. Not at all bad for a camera that is now 60 years old.
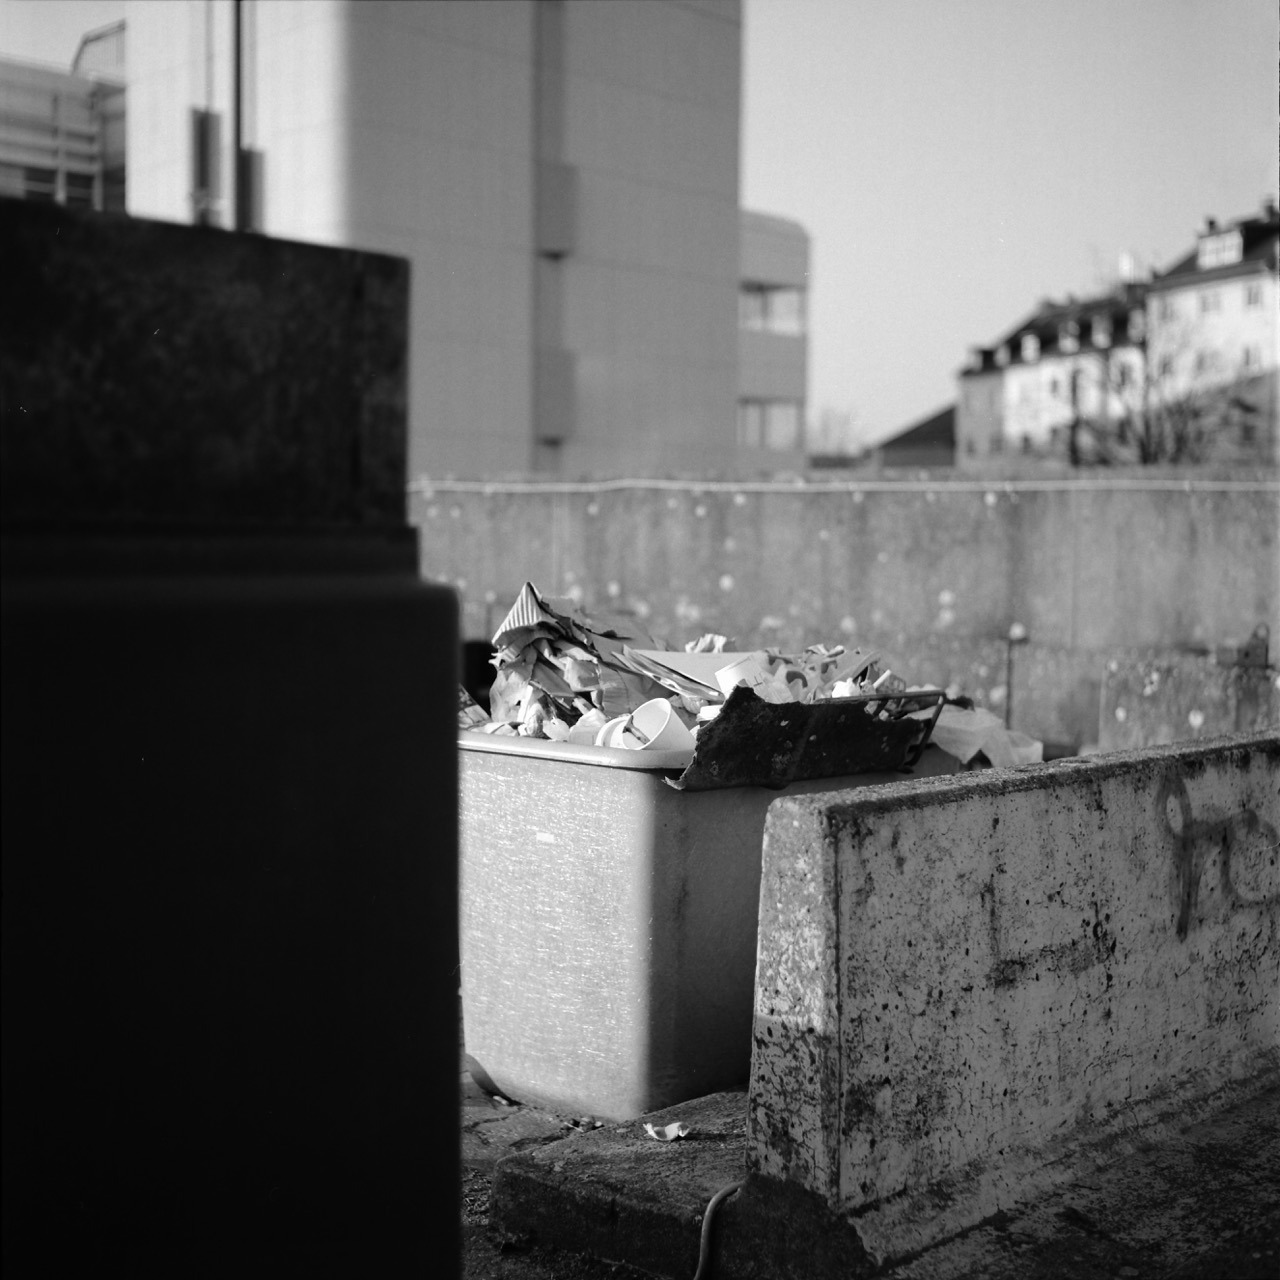
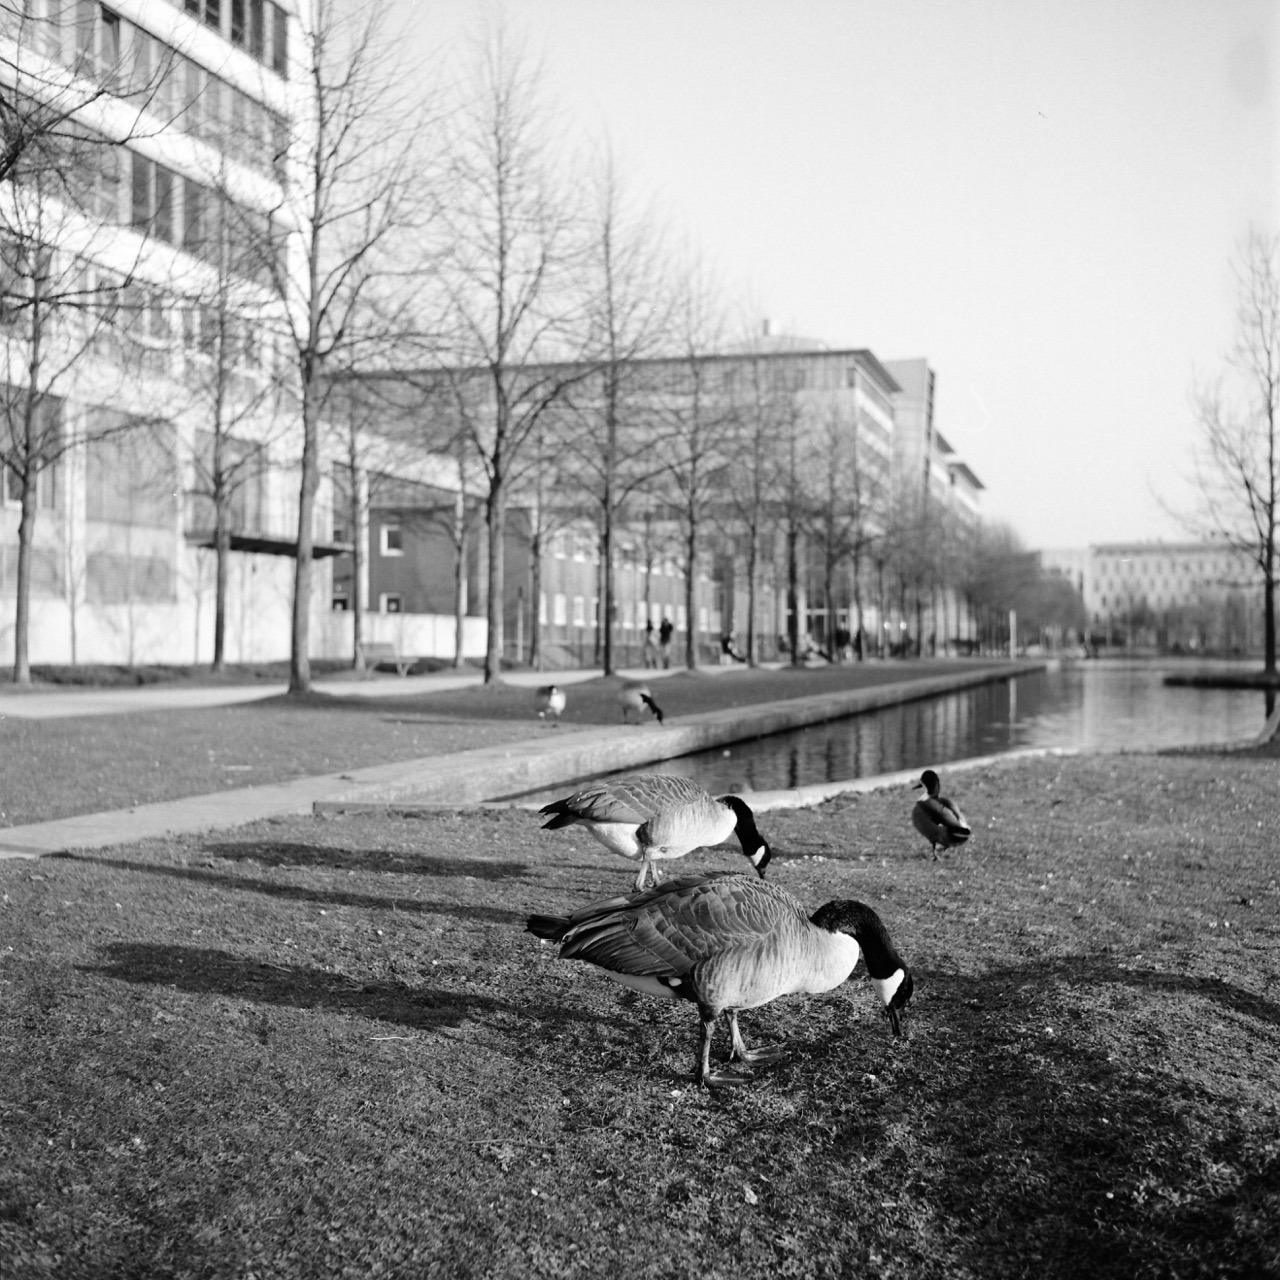
Of course, I immediately went out and shot a test roll with it. Here are a few shots from this test run. All shot on Fuji Acros 100 film, developed in 1+50 Rodinal, and scanned with the Canon CanoScan 9000F MKII.
Ok, holding this cam still with slow shutter speeds obviously isn’t something I’ve mastered, yet. But otherwise, it’s great fun to shoot! And certainly of a lot higher quality than the plastic Lomo Lubitel.
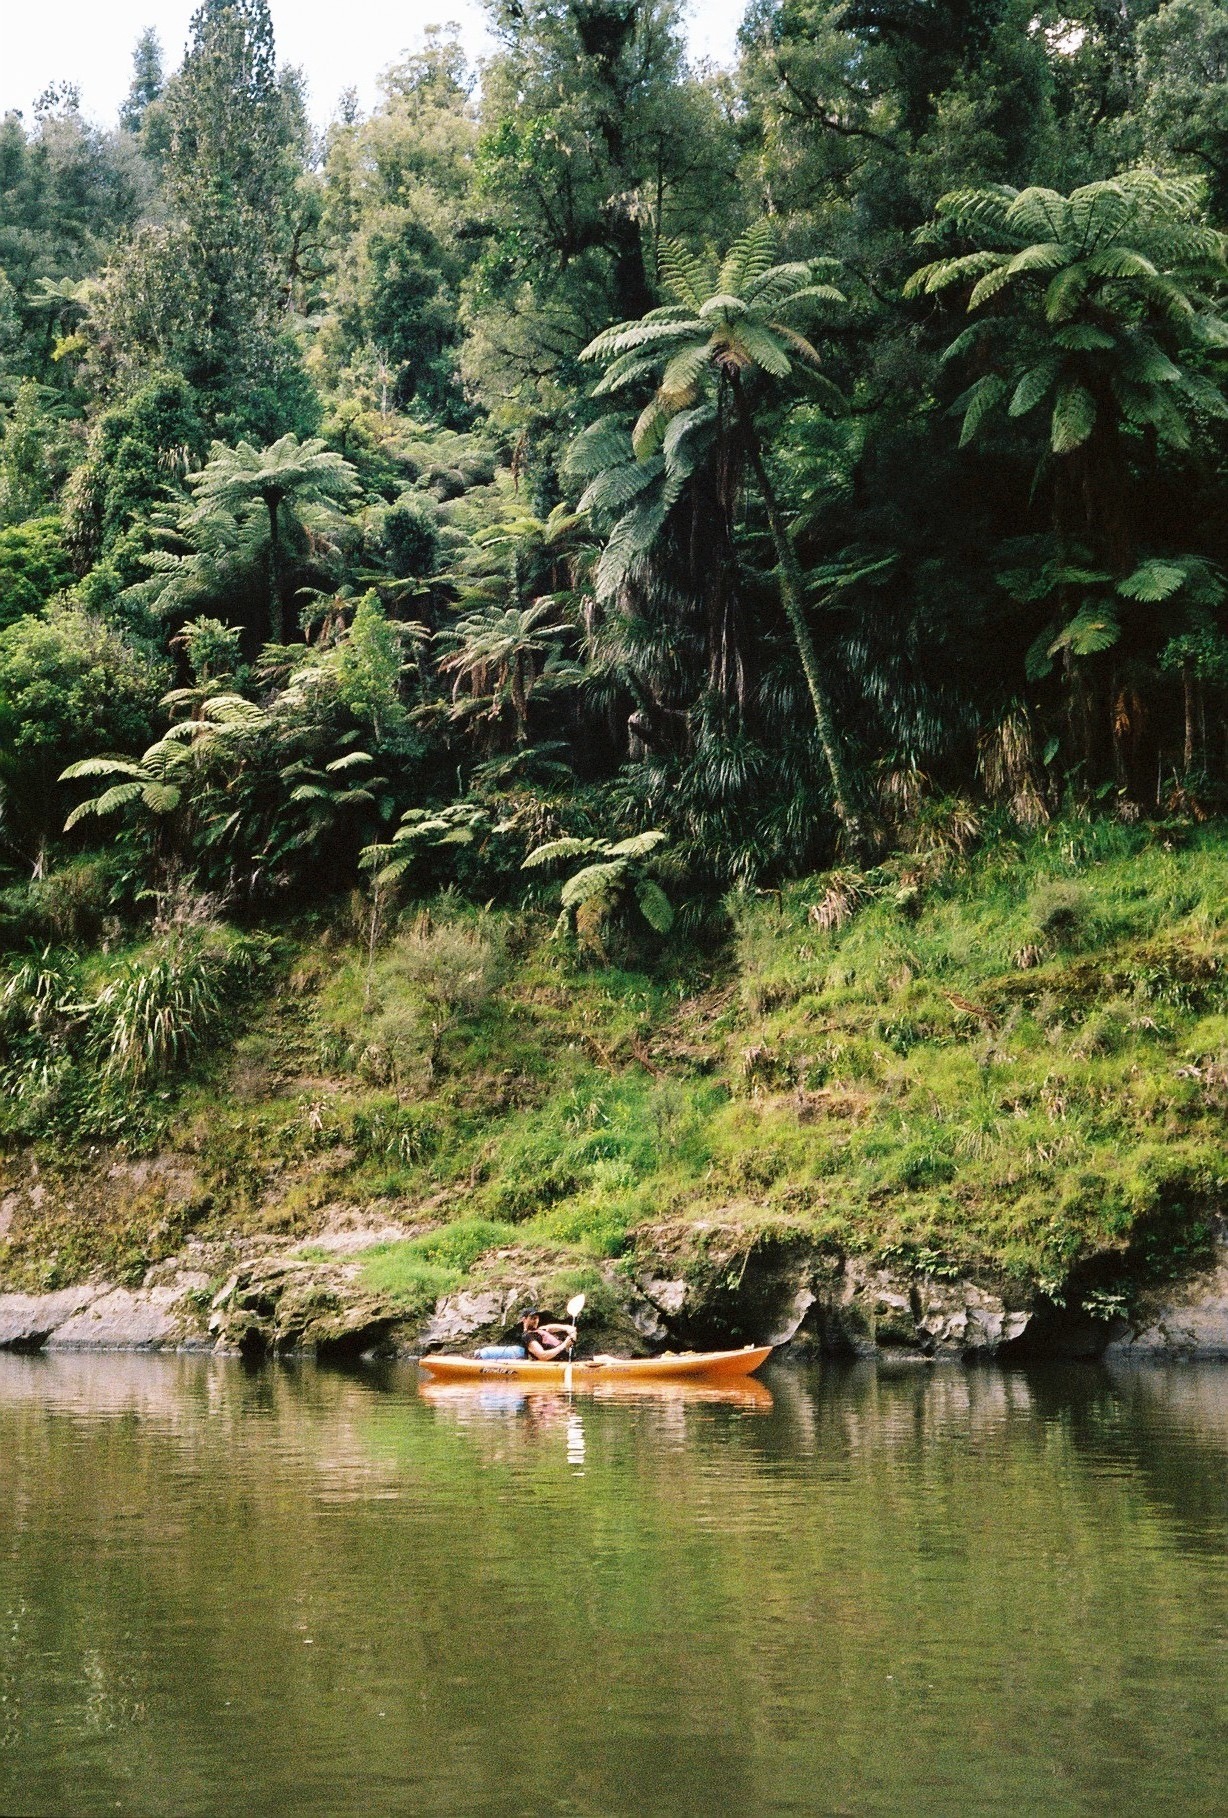
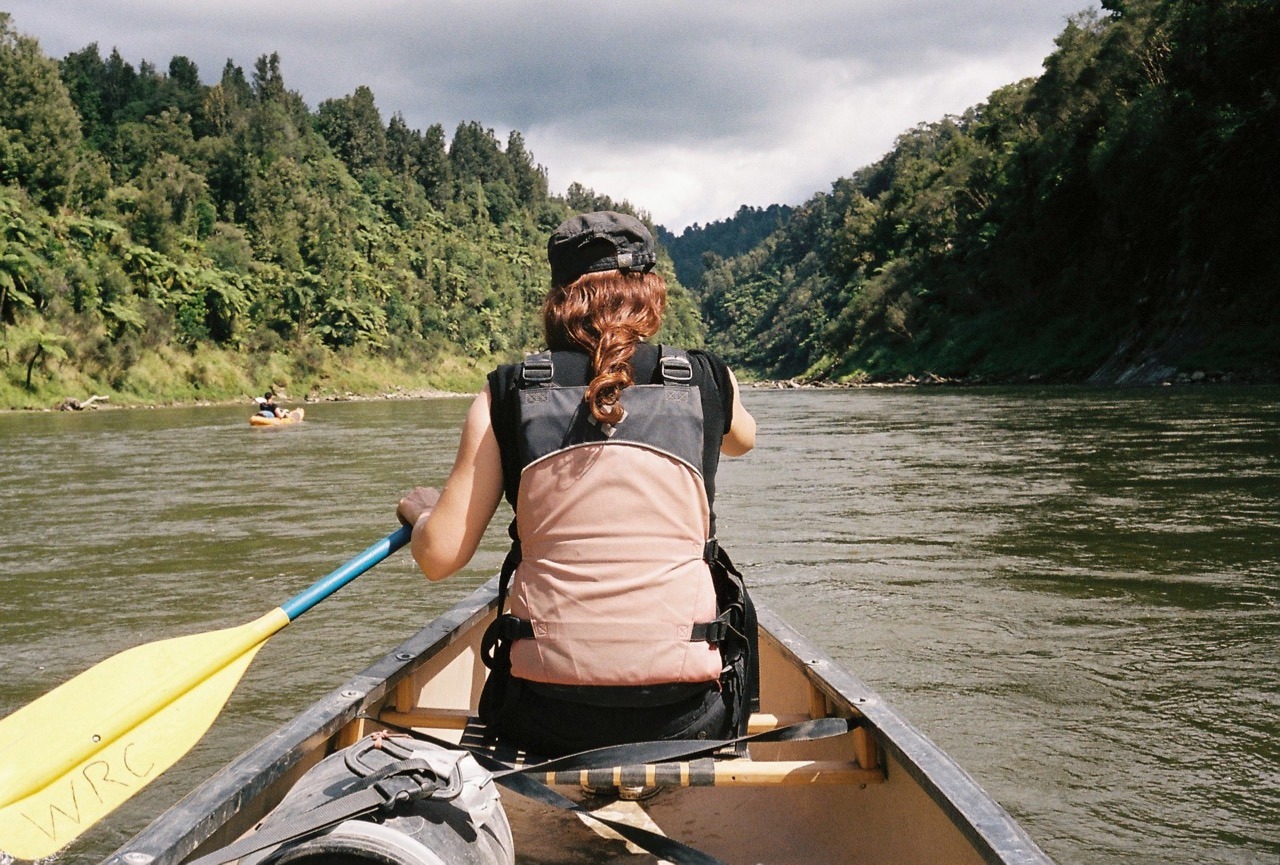
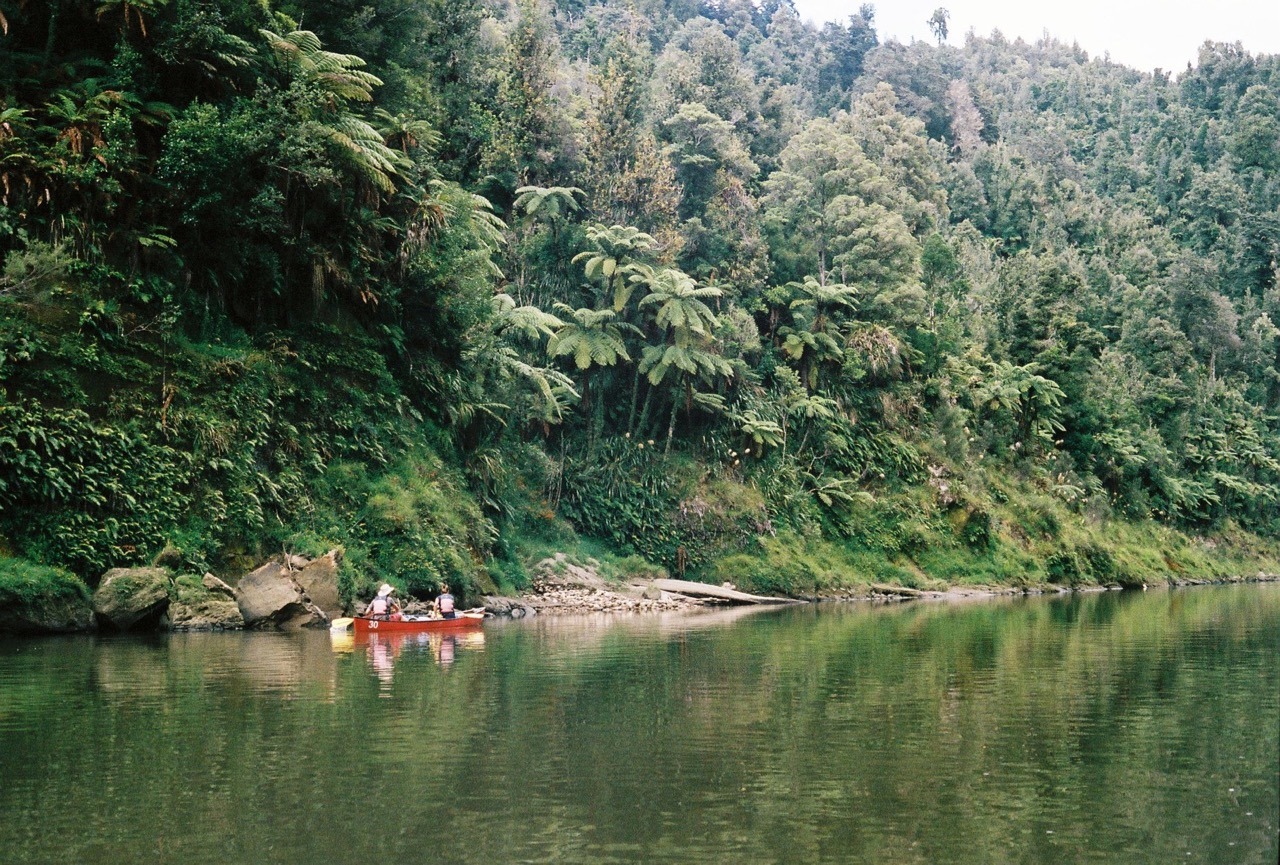
The three of us – Andre, Nicole, and I – spent the first 3 days of February with a 3-day canoe/kayak trip on the Whangnaui river called the “Whanganui Journey”.
Andre in his Kayak.
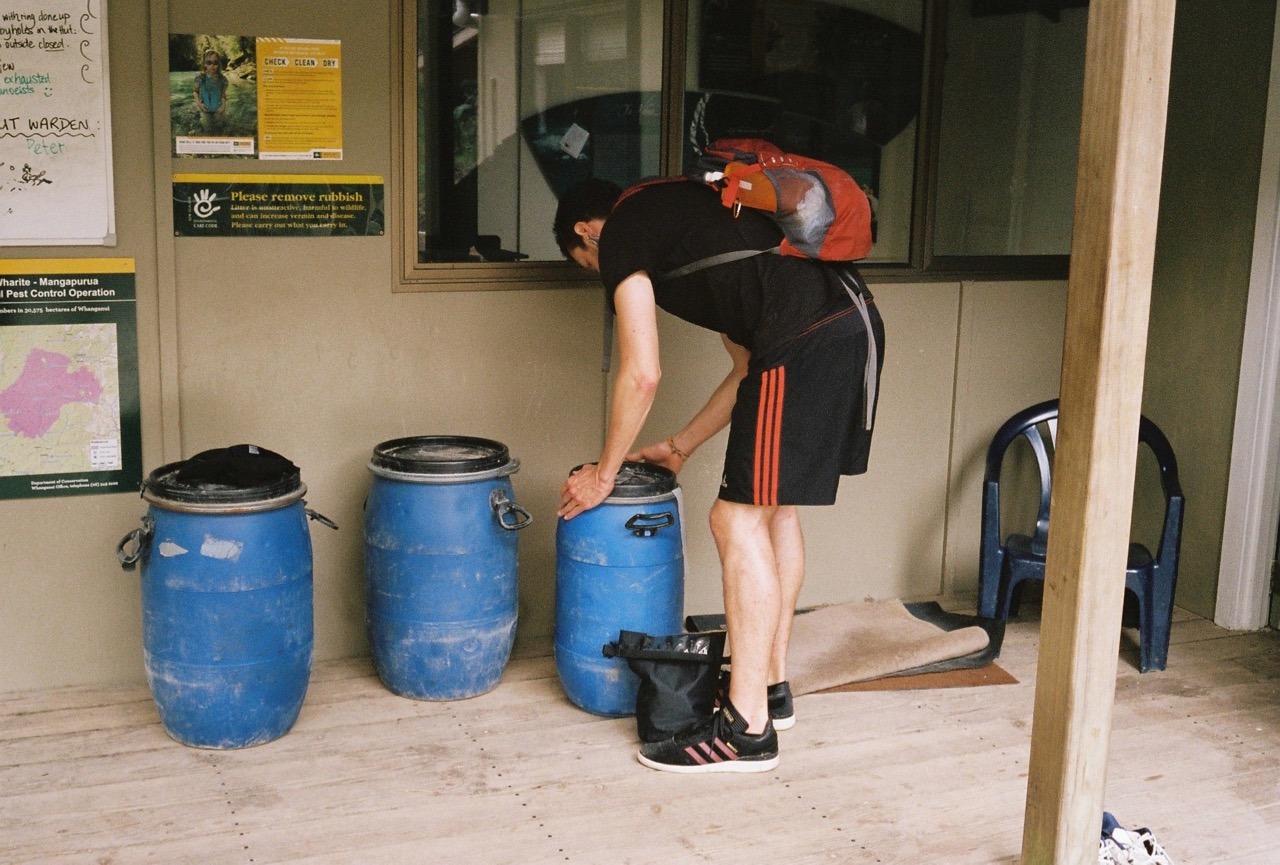
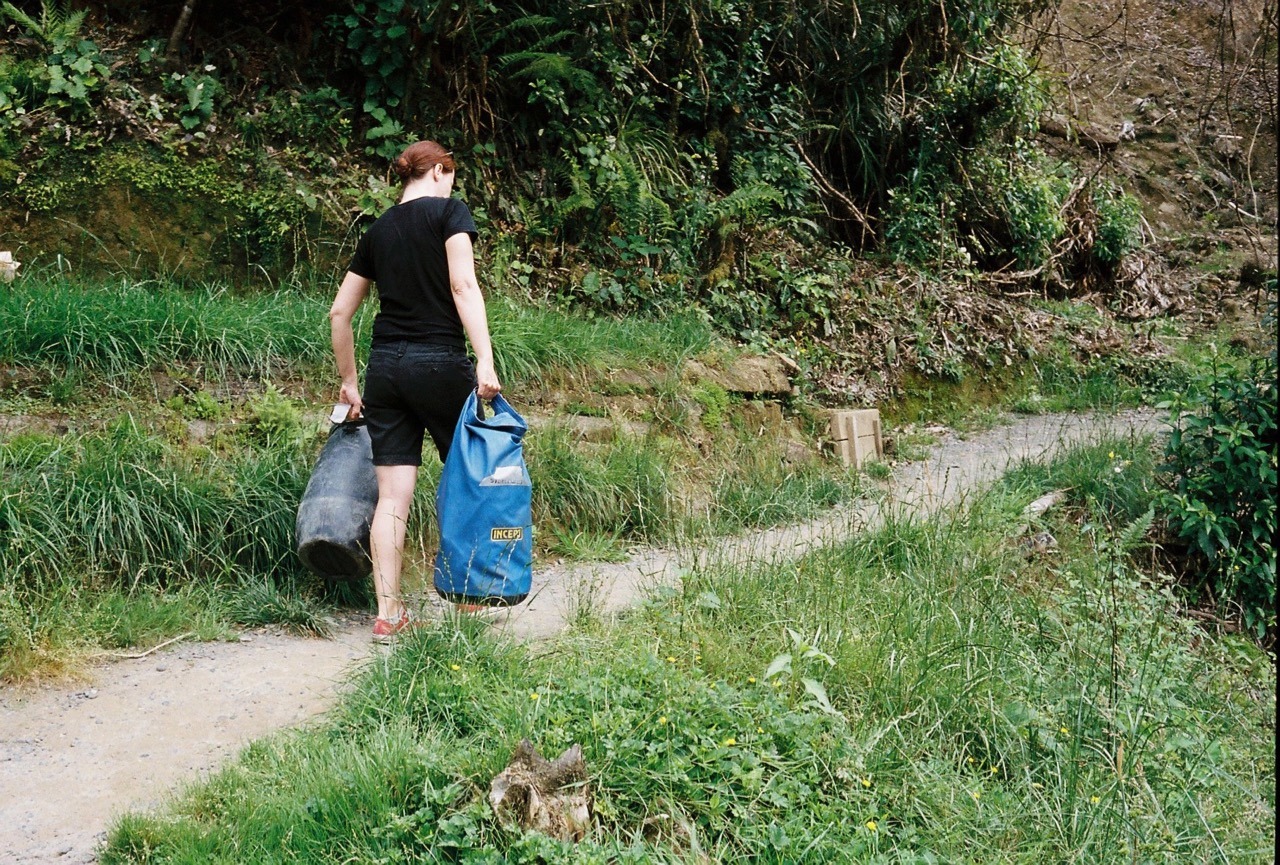
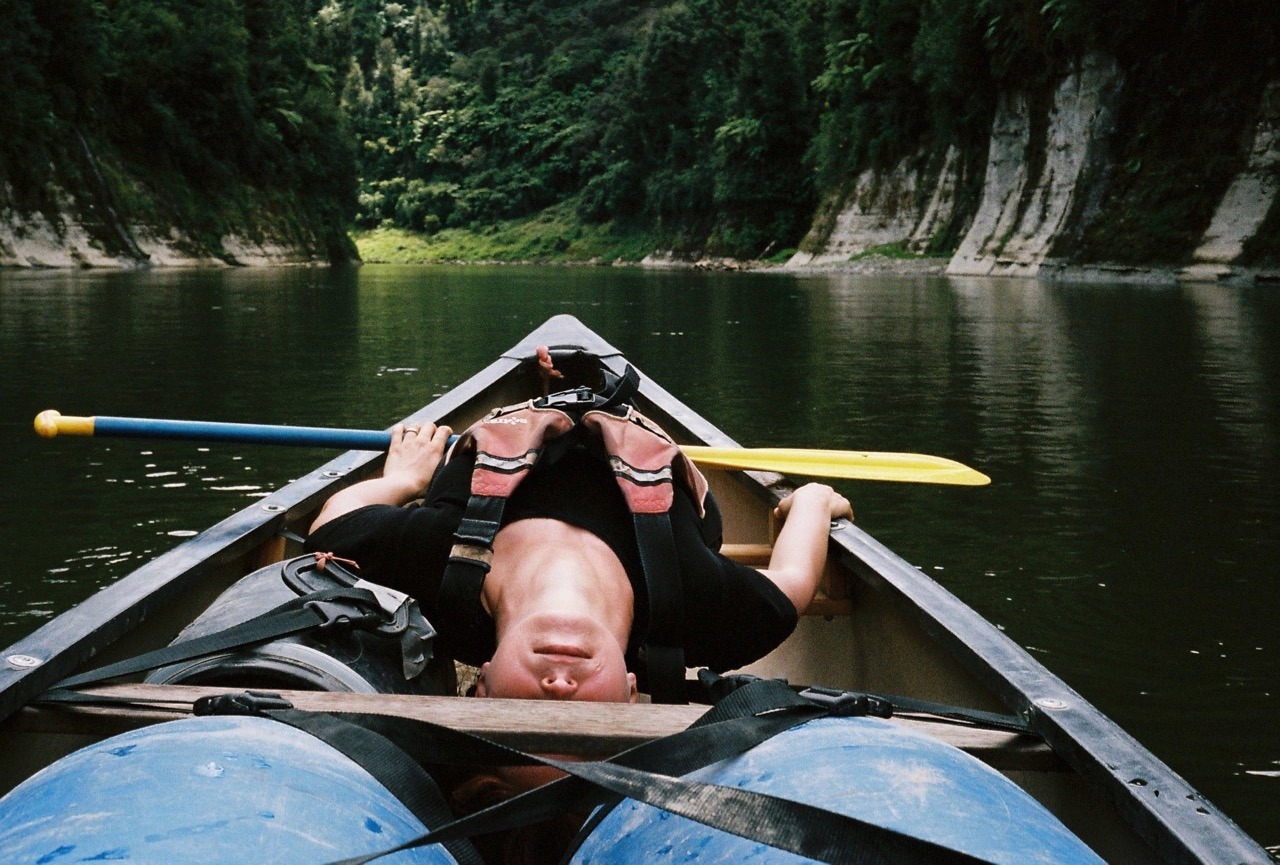
Andre was in a single sit-on-top kayak, while we were in a double canoe. Our gear was stowed in somewhat watertight barrels or dry bags.
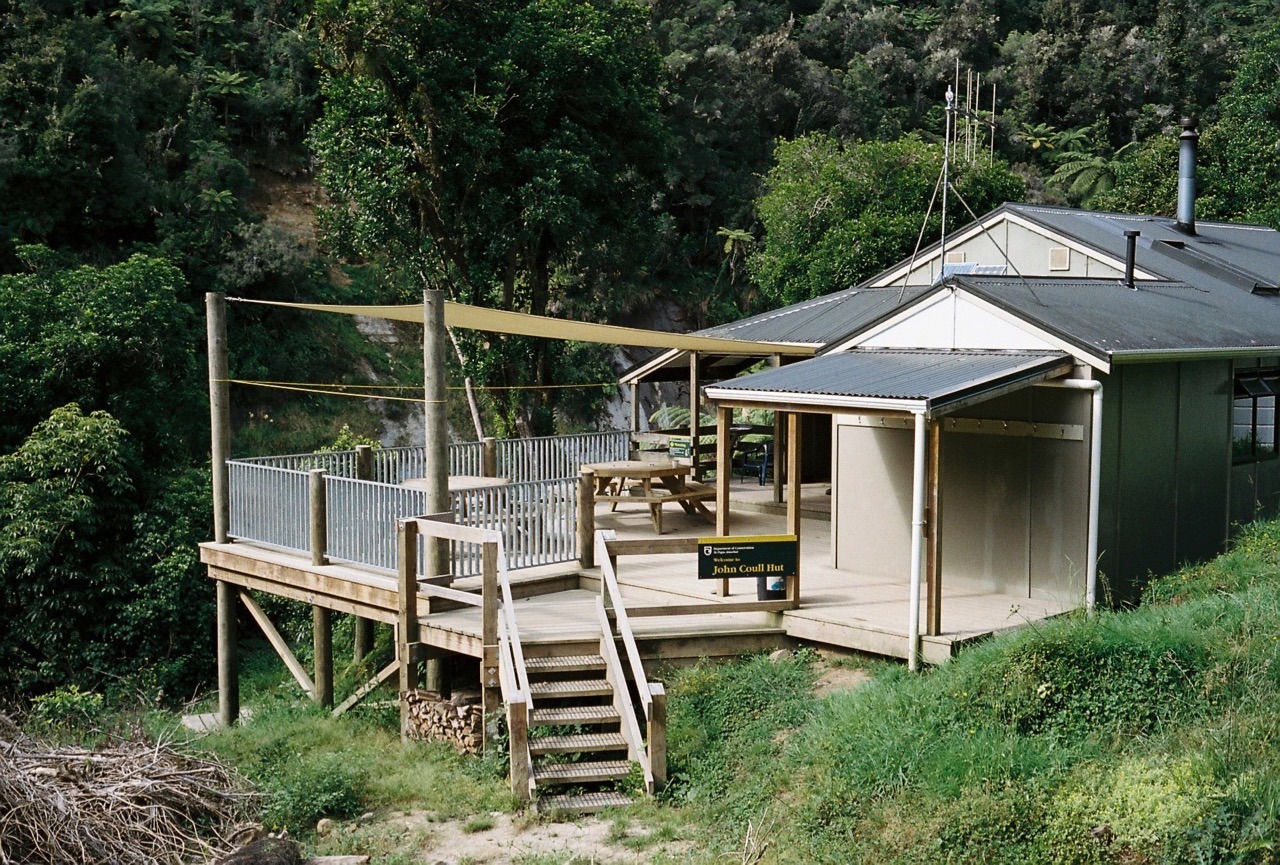
Overnight, we stayed in the familiar DOC huts. The first one was John Coull hut.
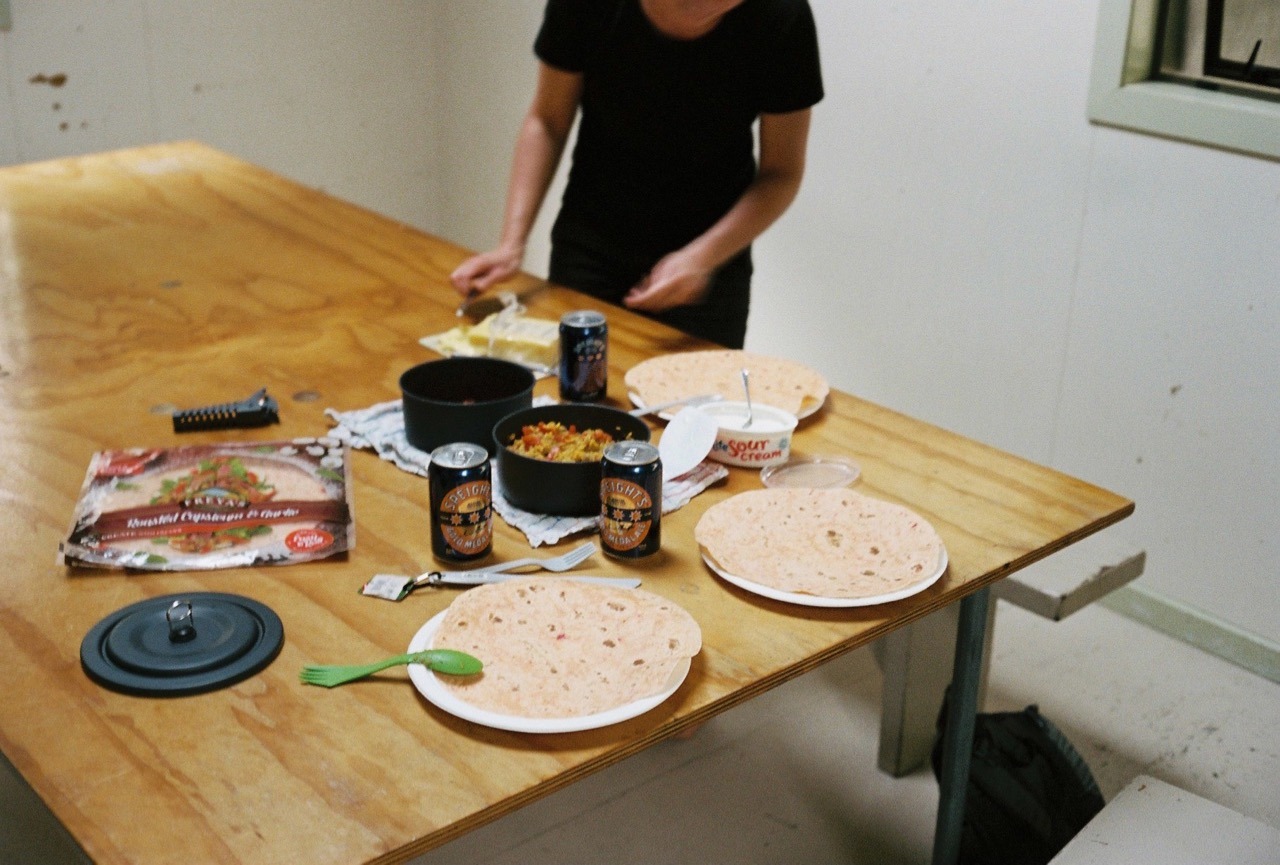
Because we didn’t have to carry all our gear in a backpack, we could afford to bring some more luxurious food and drinks. Like fresh veggies, tortilla wraps, and a couple of beers. So, on the first night we had some burritos.
On day 2, one could do a little walk to the “Bridge to Nowhere”.
In general, the trip consisted of easy and enjoybale paddling most of the time, with the occasional rapid in between for some more speed and excitement. To escape the heat, we occacsionally stopped at a small beach – called a “shingle” – to rest and go for a little swim to cool down.
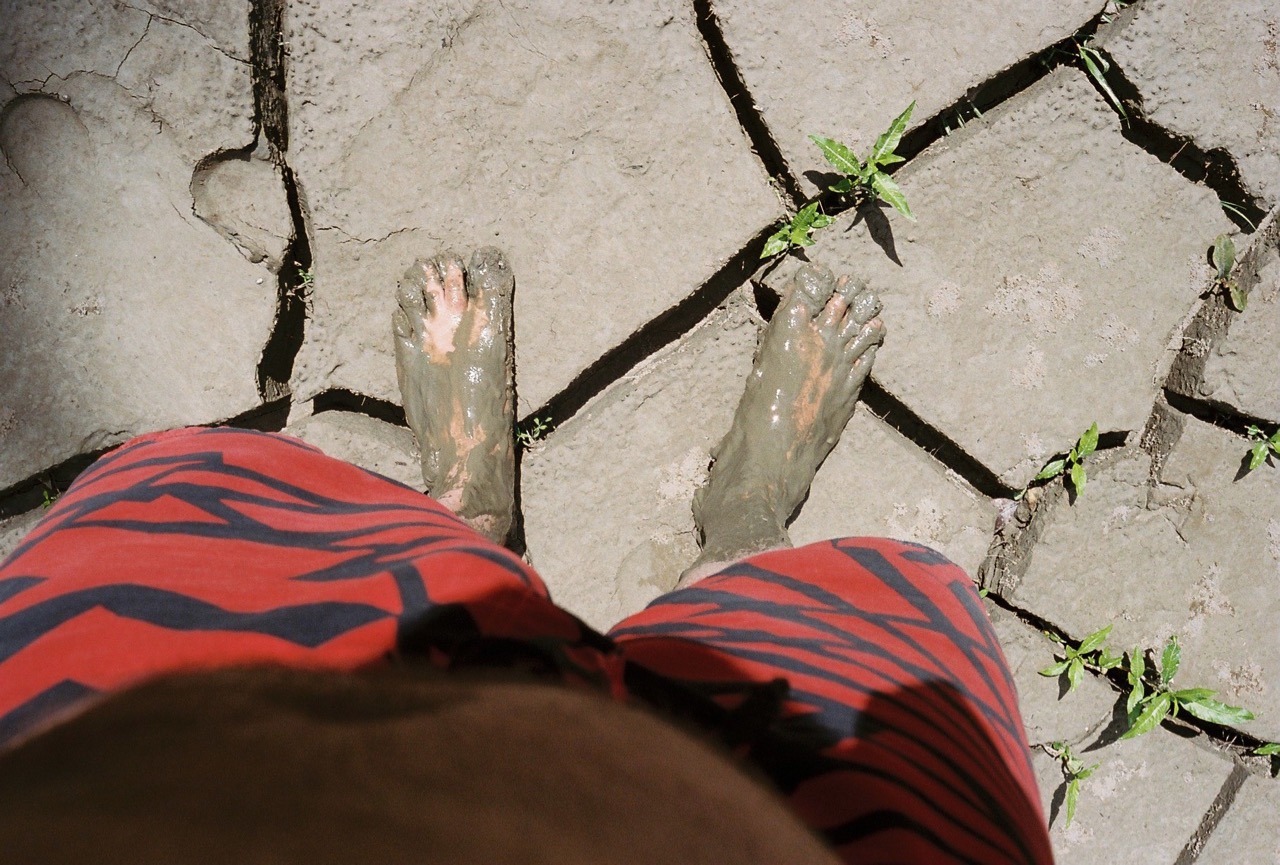
Nicole, stretching her back.At the one swimming spot, I sank into the mud a little bit.A couple of “cold ones” on the river.
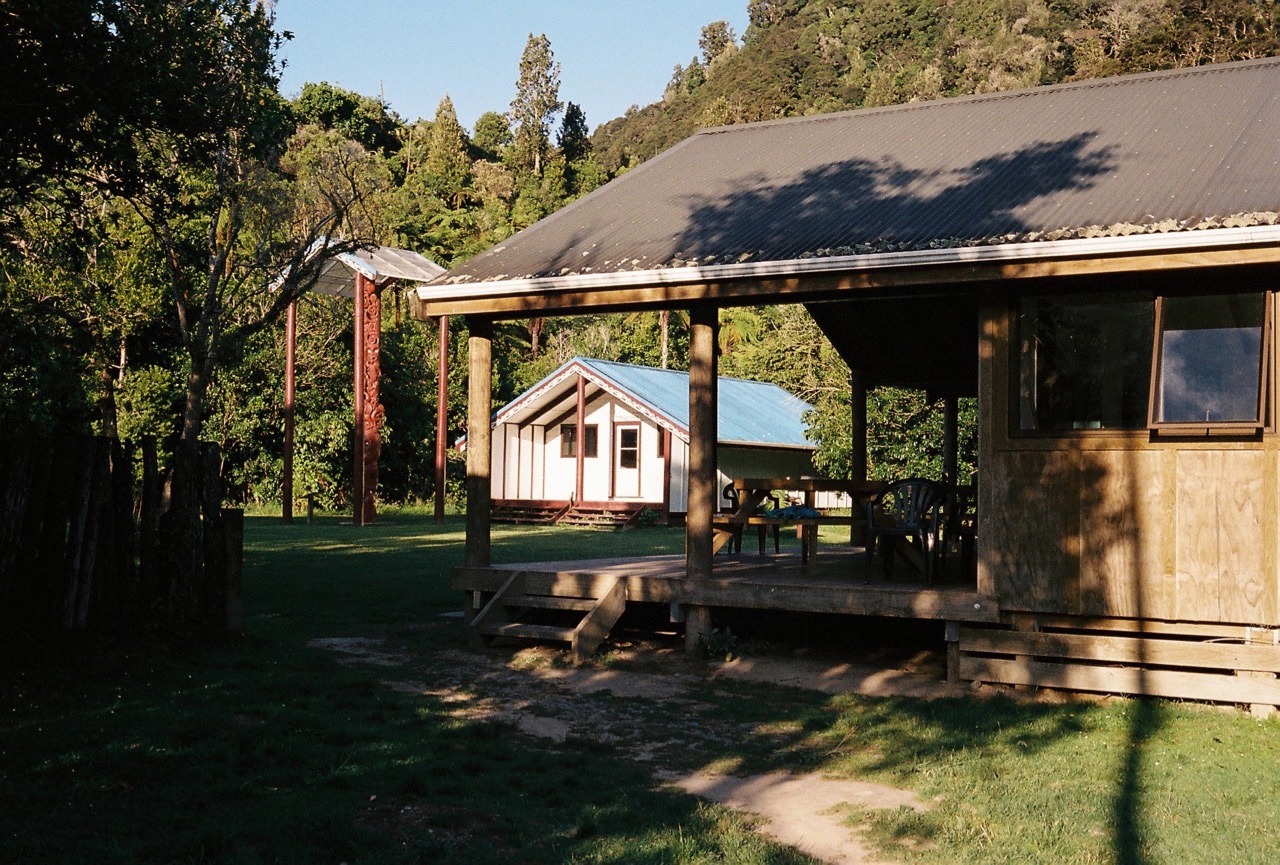
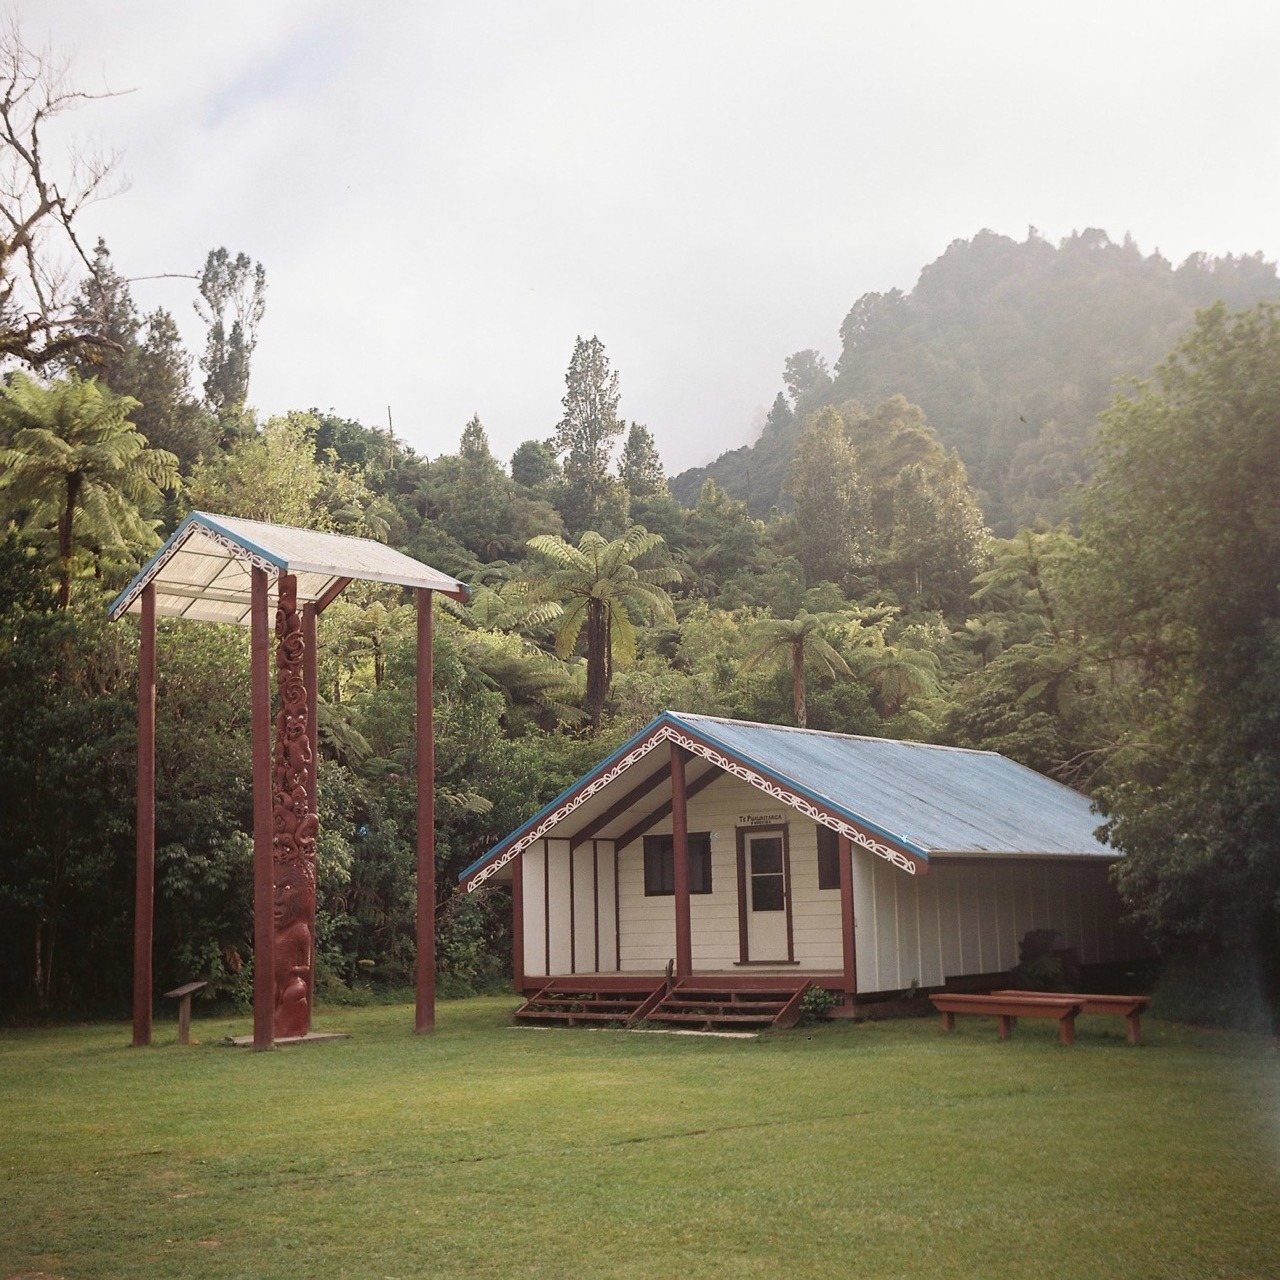
The second hut was Tieke Kianga. This hut has a marae – a Maori communal house – right next to it, belonging to the local Iwi (a Maori tribe).
The marae in the morning.Occasionally, we came across a jet boat on the river, which is a tourist attraction in itself or simply used for transportation.
Overall it was a very nice trip and certainly something different than hiking.
We’re very excited to be visiting New Zealand for the next 6 weeks. It’ll be a mix of work and travel. And I will finally get to meet the Rankers crew.
I thought about it for a while before making the booking, because I thought it’s maybe a little decadent to do so. But Nicole quickly convinced me by saying something along the lines of: “You only live once. You like his photos a lot. Go, do it!”. So I booked the workshop, flights and accommodation.
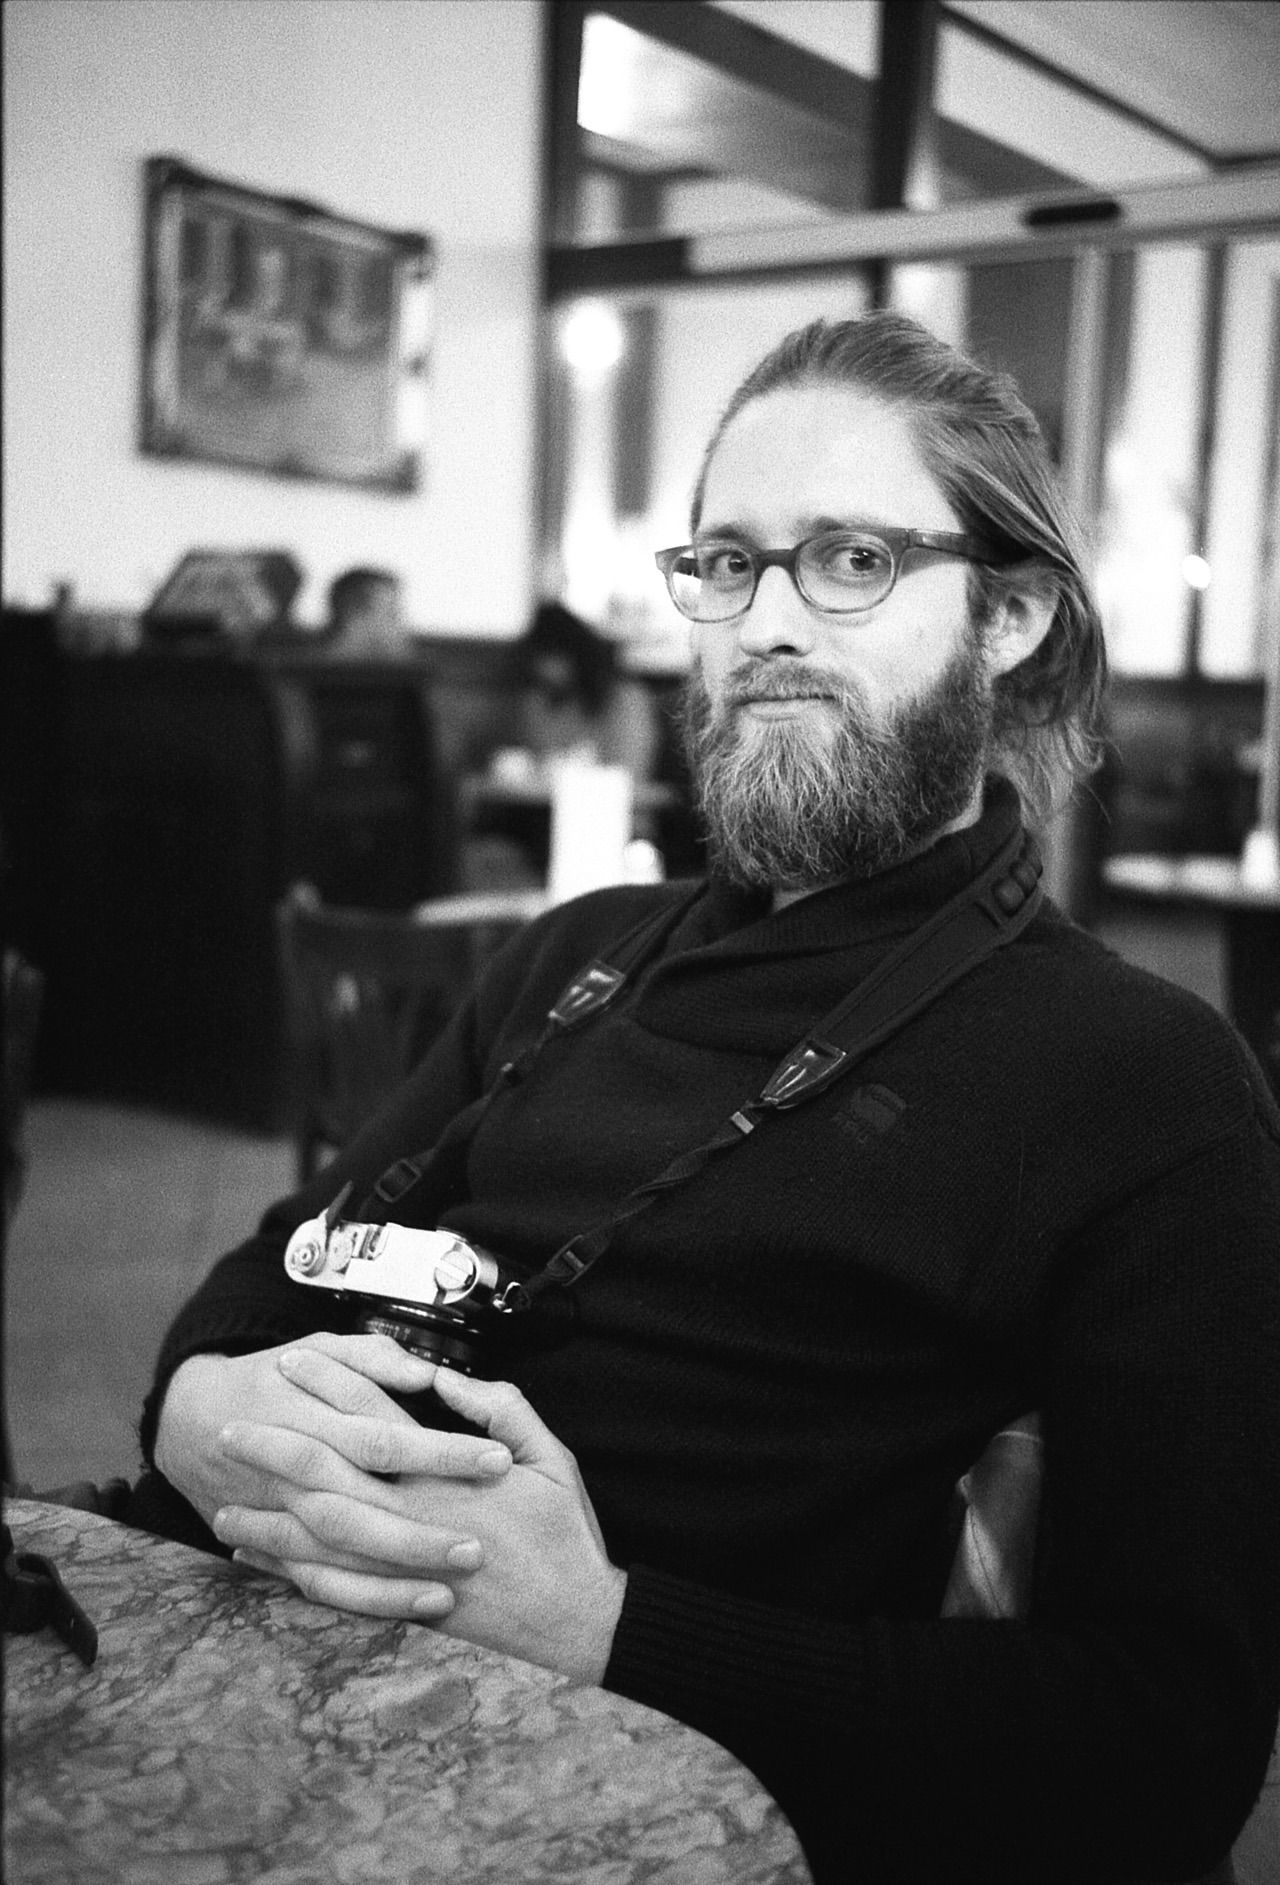
Unfortunately, and to my surprise, the workshop was cancelled two days beforehand and one day before my flight on Tuesday. But lucky me, Severin contacted me directly and suggested to do a workshop just for me. Instead of the originally scheduled 3 days, the workshop took place on two days – one day meeting and shooting and one day in the darkroom. But that was absolutely fine with me, now that I got an exclusive one-on-one training.
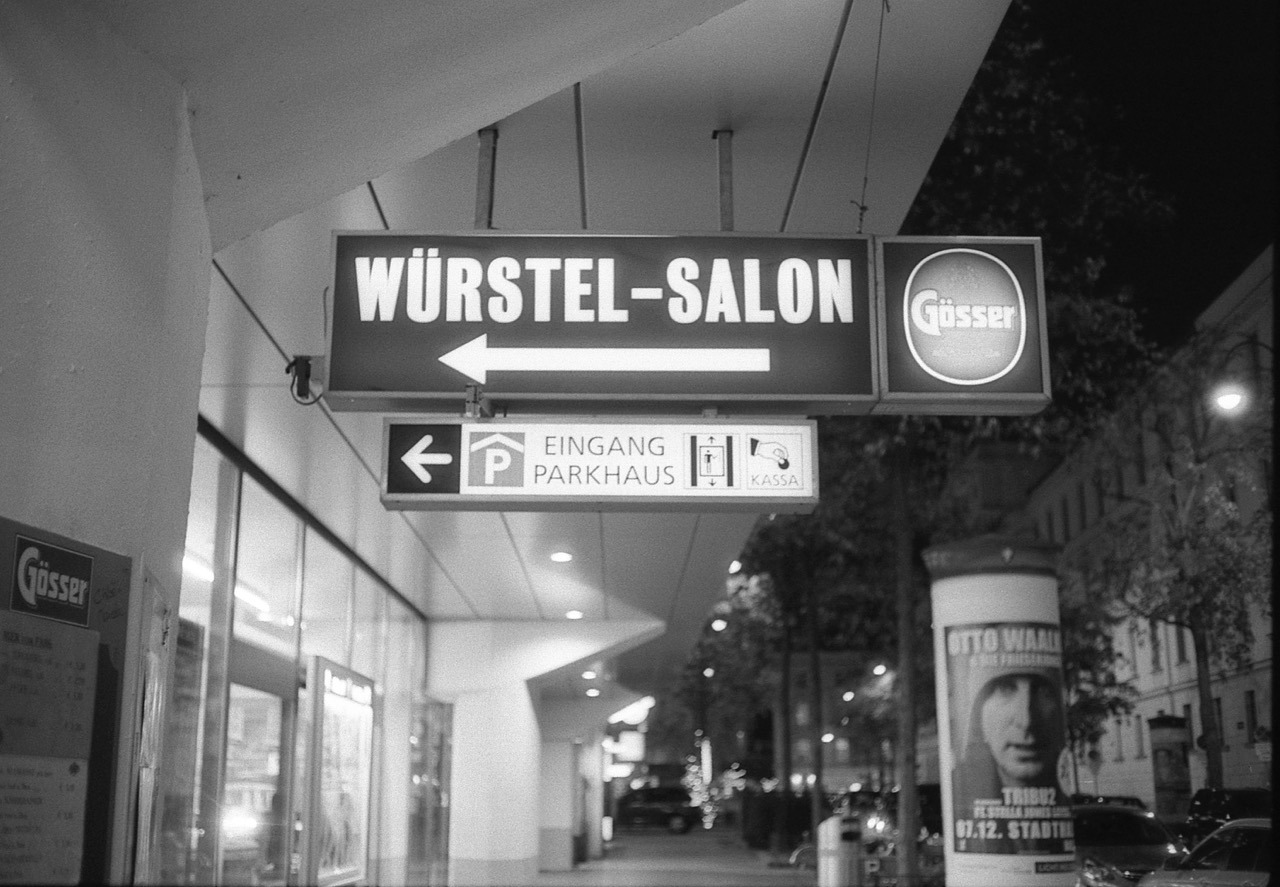
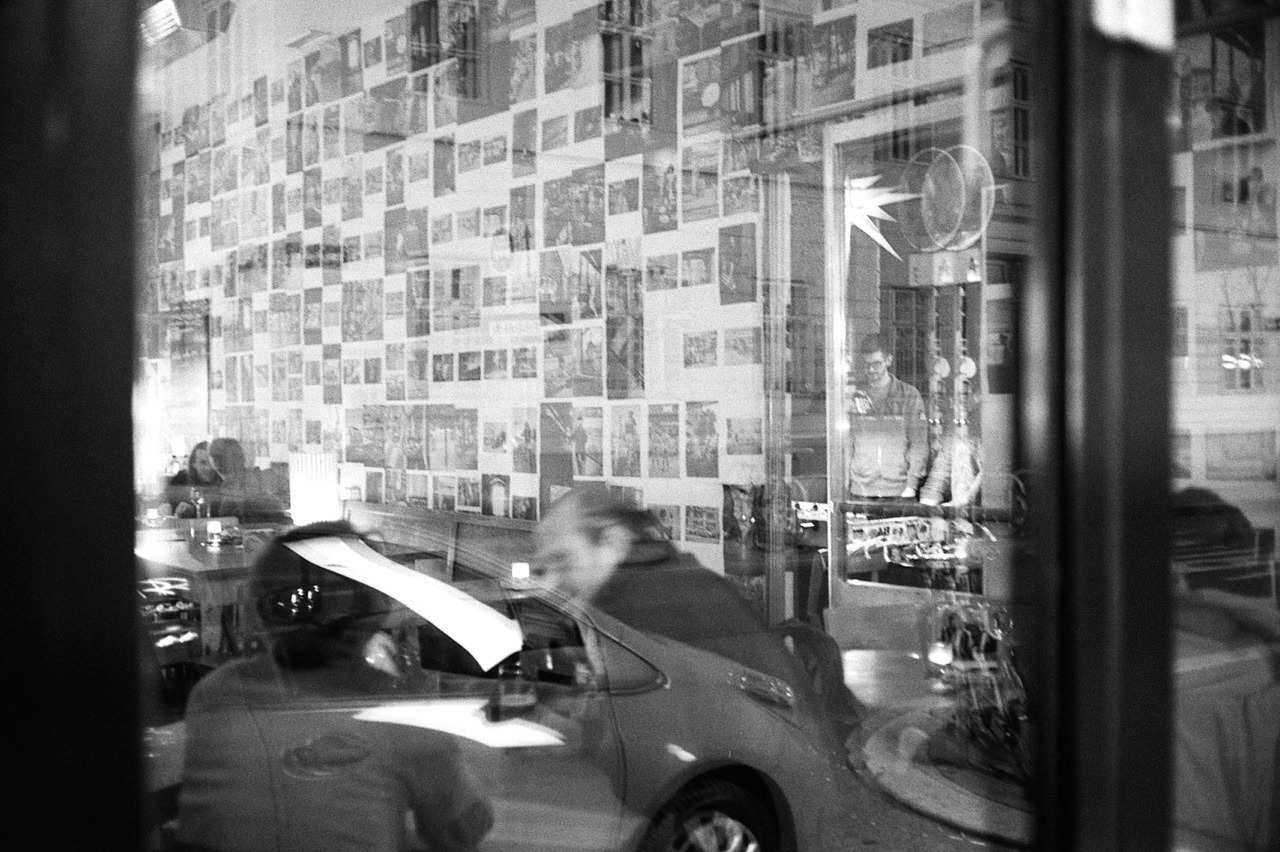
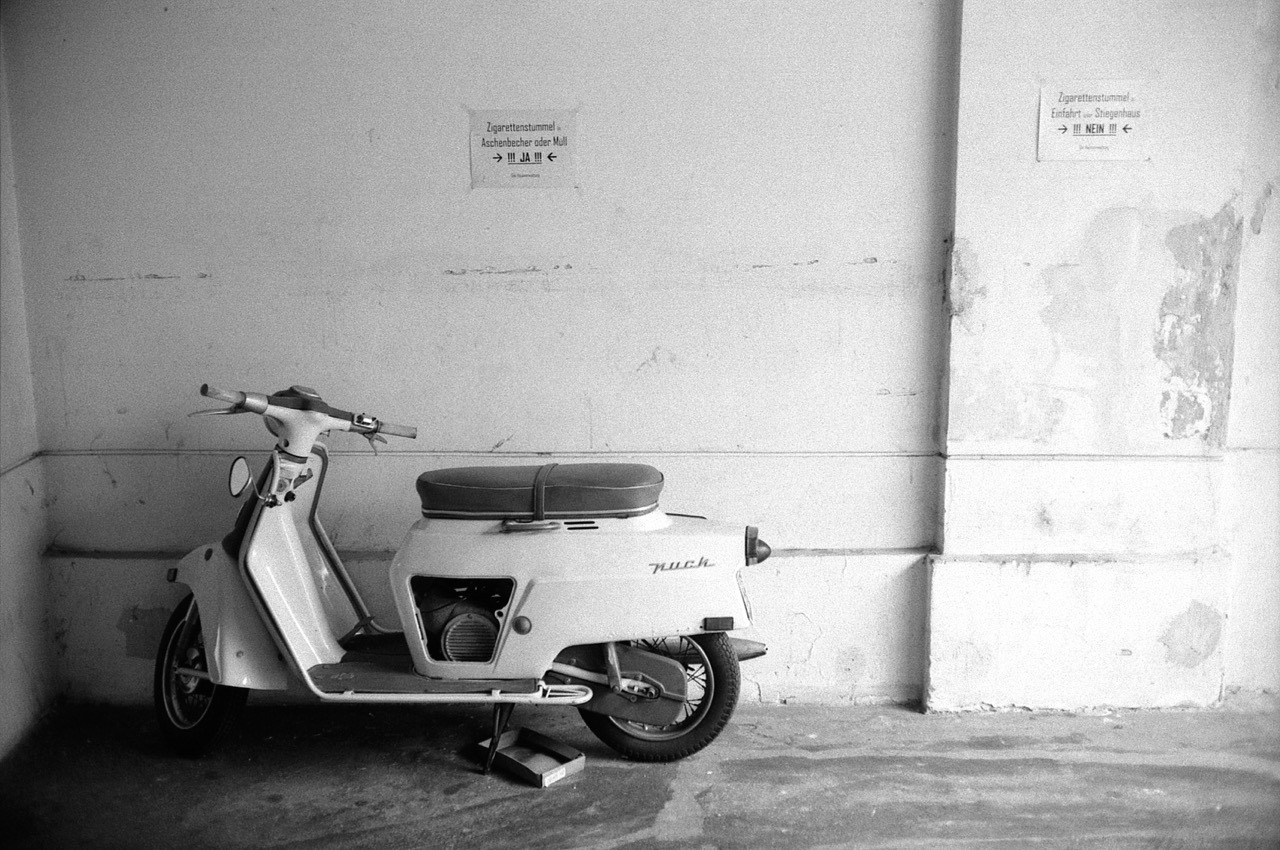
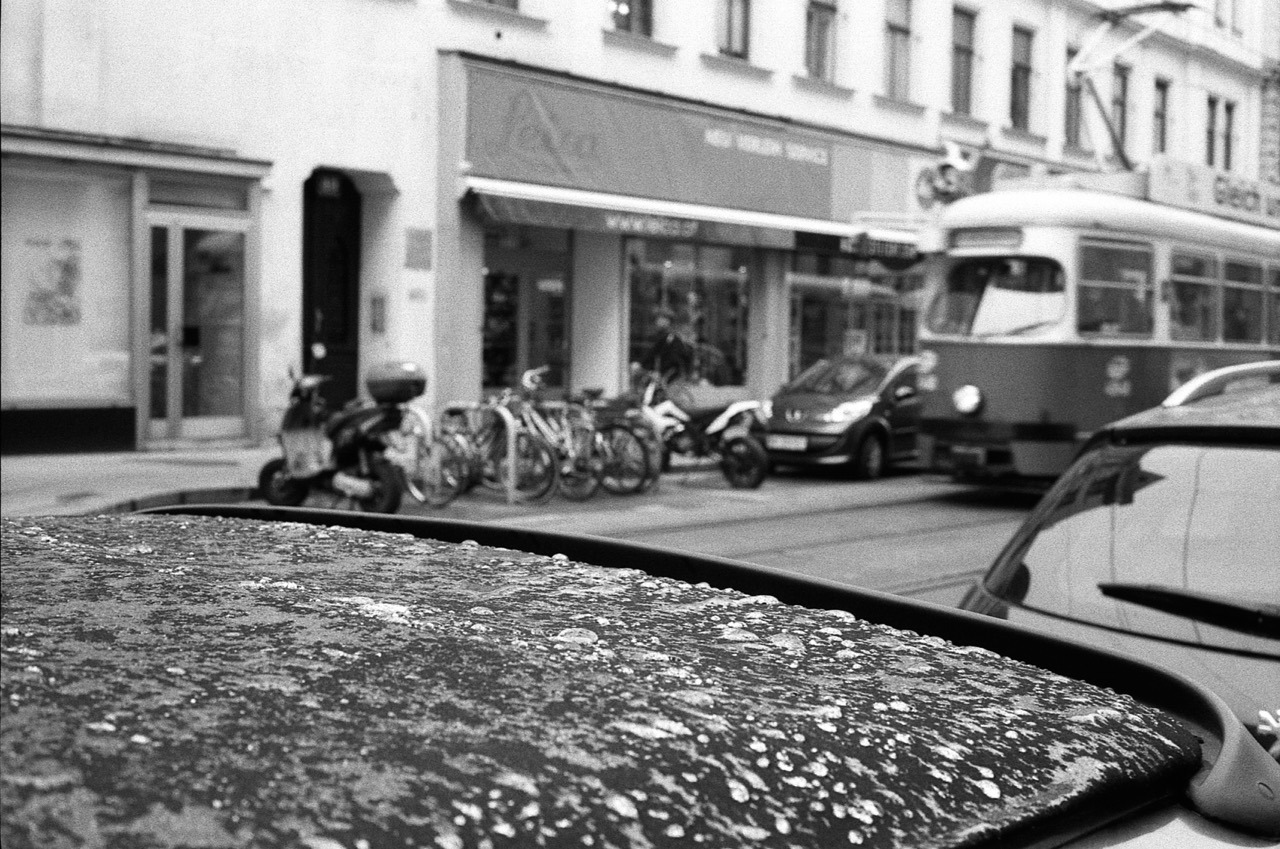
So, here are my impressions from these days in Vienna. One roll was shot on my Olympus Trip 35, but most photos were taken with a Canon Canonet G-III QL-17. The films were either Ilford HP-5 Plus, Kodak Tri-X or Ilford FP-4. The rolls were developed in Xtol 1+1 and scanned with the Epson V200.
MoonlightCafé Wirr with Severin’s Vienna-Mag hanging on the walls.It was cold!
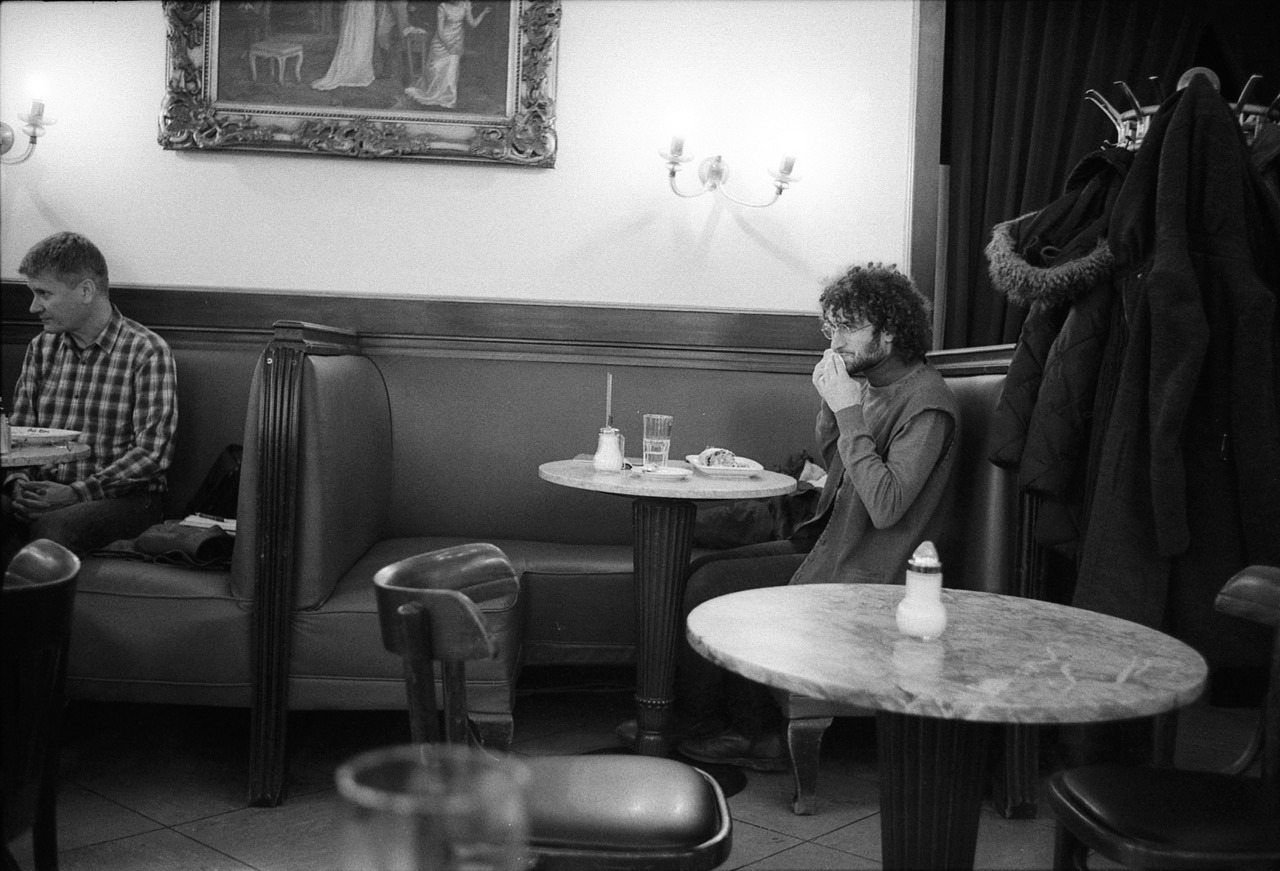
On Thursday, the first day of the workshop, we met at Café Ritter, had coffees and got to know each other. We then went out, walked on and around Mariahilferstraße and shot quite a few frames before having an early dinner.
First meetup with Severin at Café Ritter.Read More...
As you may have noticed I have stopped posting new photos to my 365 day photo project. The reason is simple: the photos – and particular the one from Monday last week – are stuck on a film that’s still not full. I’ve loaded a new film last week Sunday evening, at the end of our 3rd hiking day. Unfortunately, I got sick during that night, unable to continue hiking the next day. Hence, I only took a few film shots the next morning instead of having had a whole day of shooting ahead of me. So, I returned home with 30+ photos still left on the film. And I haven’t yet managed to fill it up. Hopefully, I’ll manage to do so by the end of the week though, and then everything will be posted here in quick succession.
Disk Utility confirmed that the drive needed repair, but told me I have to repair it when booting from the Recovery Partition. But trying to repair it from there was not successful, either. And from then on the machine refused to boot. It crashed/turned off, right after I entered my password – which I had to enter early, because my drive was encrypted with FileVault.
Btw.: I will actually not use Fusion drive on a Mac as HFS+ is not really keeping my data safe (see my HFS+ fails miserably demo). Using two HFS+ disks concatenated just increases the risk of data failure. And TimeMachine as backup has failed me as well in the past.
So, I decided to split up the Fusion drive, re-installed Yosemite on the SSD, and copied over my data from the Time Machine backup via Migration Assistant.
Now I keep the OS, apps, code and as much of the other data as possible on the SSD, and store my large media files (photos, music, videos) on the old, spinning, still-internal HDD.
I don’t know what the underlying problem was really, but I’m not keen to risk my data to a buggy Fusion Drive any longer. My system is now back up and running again and Disk Utility tells me that both my SSD and my HDD “appear to be OK”.
Why? This will allow other people’s software to easily read and understand your content. This is useful for a variety of things like recognizing comments, likes, reposts, and displaying reply-contexts for your posts.
For example, if I sent a webmention to someone else’s site/URL1, this other site can easily parse my post and could – for example – display it as a comment.
Another use case that I like, is that the Moncole reader can now parse and display my content.
The best way to use microformats-2 is with as little additional markup as possible. This keeps your code cleaner, improves its maintainability, and thus the quality and longevity of your microformats.
One big advantage of microformats-2 over previous microformats (and others) is the ability to add one class name to an existing element to create a structured item.
So you shouldn’t (necessarily) need to add, remove or alter your existing HTML tags. However, I found this to not be doable in my case.
For texts posts for example, I had a structure like this:
Marking up the article and h2 elements wasn’t a problem: I just had to add class="h-entry" and class="p-name" respectively. However, I didn’t have a HTML-tag wrapping the content, so there was no tag to put on the extra class="e-content". Hence – with feedback and approval from Jeremy – I had to add an extra div to make this work for me. Here’s the new (simplified) markup for a text post:
It’s certainly no secret, that Tumblr offers a RSS-feed for your blog. But what I only found out fairly recently, is that there are individual RSS-feeds for all index-pages of a blog, such as tag-pages, day-pages and search-pages. You just have to append /rss to the index-page’s URL. So, http://blog.danielpietzsch.com/tagged/photos/rss, will serve to feed for all my photo-posts, for example.
Here’s a little CSS-snippet that let’s you select only photos of a certain orientation in your Tumblr theme.
A little warning up-front: it’s not foolproof. It relies on that you post high-resolution photos at a size that fills Tumblr’s maximum photo dimensions, which means, landscape photos should be at least 1280px wide and portrait photos should be 1920px tall.
Update 29.04.2015: I was wrong with assuming portrait photos are always 1920px high. They of course also max out at 1280px in width. So I’ve updated the post to still make it work.
So, here’s how to do it:
The HTML img-tag must specify the width and height attributes. Like this, for example:
This gives you the ability to select images of a certain orientation with a combination of the CSS attribute-selectors and the negation pseudo-class. Assuming your photos are always 1280px wide – no matter if they’re landscape or portrait – you’ll need to specify a :not-selector for each aspect ratio’s height you’re going to use.
So, for example, for a 2:3-ratio, the height would be 1920px and hence the selector would need to reflect that.
Here’s an example how I select only landscape photos by excluding images that have a portrait orientation and have an aspect ratio of 2:3 and 3:4. I use this to make landscape images wider than the otherwise 700px-wide container:
/* only for displays wider than 900px */
@media (min-width: 900px) {
  /* selects landscape <img>s by selecting only the ones that are 1280px wide, and not 1920px tall */
  main .post.photo.photos img[width="1280"]:not([height="1920"]):not([height="1707"]) {
    max-width: 900px;
    margin-left: -100px;
  }
}
For selecting only landscape photos, you can just use img[height="1920"]img[height="1707"].
Again, this won’t work, if you do not upload high-res images. But if you do and want to style photos differently based on their orientation, this might be a good-enough solution for you, too.
Over the last couple of days, I created my first Tumblr theme to give this site a little refresh. My major focus was typography and a more simple and more semantic markup.
I’ll continue to improve and refine the theme, but I think the major bits are all done. Take a look, if you haven’t already!
Tumblr now seems to allow bigger images in text posts. It still defaults to showing the 500px-wide version, but when you replace the _500.jpg-bit at the end of the URL with _1280.jpg, you’ll get the full-size version (which you could link to for example).
And they’re also properly wrapping inline image with a <figure>-tag.
Last week, I’ve been developing and scanning my first roll of 35mm film. I’m going to share some thoughts on this process and of course, I’m going to share some of the photos.
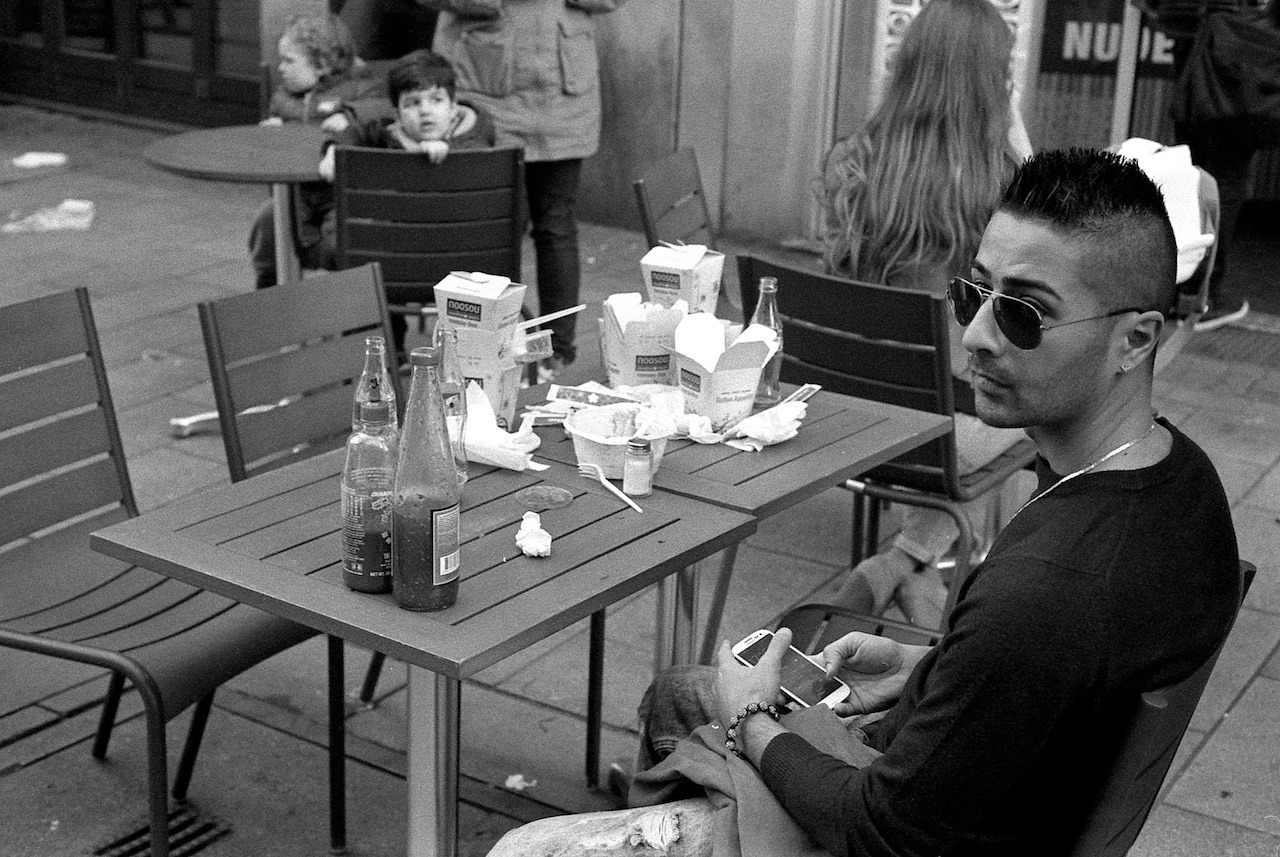
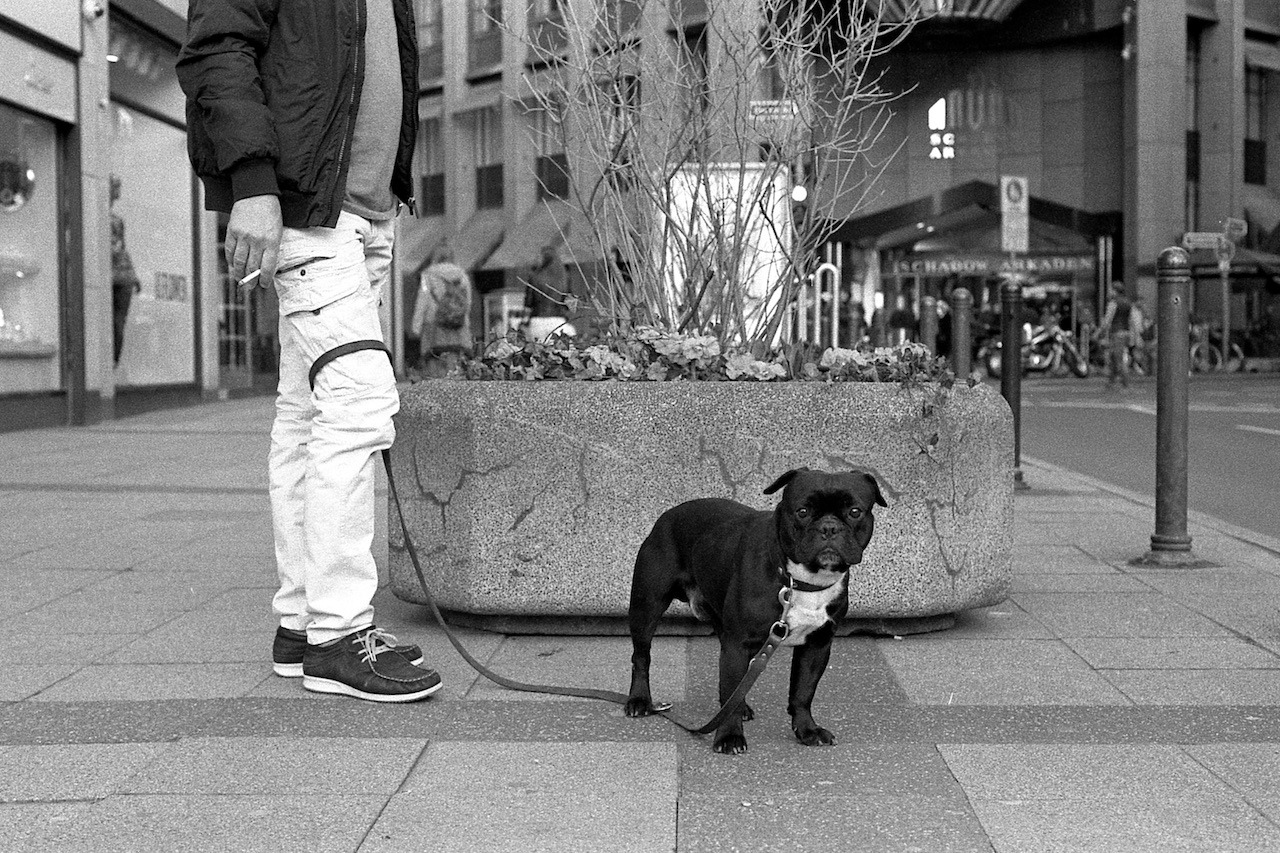
All the black and white photos shown here were shot using my Nikon FE with a 50mm E-Series lens on a beautiful and relatively warm Sunday afternoon two weeks ago in Düsseldorf. The film was a black and white Ilford HP5 Plus.
Developing
Drying film roll
The developing was a bit of a daunting task, since I didn’t want to screw up and ruin the film – either by accidentally exposing the film to light, or by making a mistake during the developing process using the chemicals.
So, I first spent some time to read about how to develop a black and white film and also watched a couple of YouTube videos. And ultimately, I found a PDF from Ilford’s website to be the best guide. Although, I specifically developed an Ilford film – a HP5 Plus – I think this PDF would be helpful regardless of the film.
FilmDev.org: Developing recipes. A good resource to see how other people are developing their films and for reassuring yourself that you’re doing the right thing.
So, the first step was to get the film onto the reel.
After I shot the film, I didn’t wind back the film completely, so the leader was still outside. This gave me the option not having to crack open the roll in the dark and thus having to handle all steps in complete darkness. Since the leader was out, I could insert the first bit of the film into the reel with the lights on.
Winding the film onto the reel was quite fiddly, and I didn’t quite manage to get it on there as shown in the videos. But eventually, I got it on there by simply pushing the film in bit by bit.
It was definitely summer for this guy
Then, I had to develop the film in four steps:
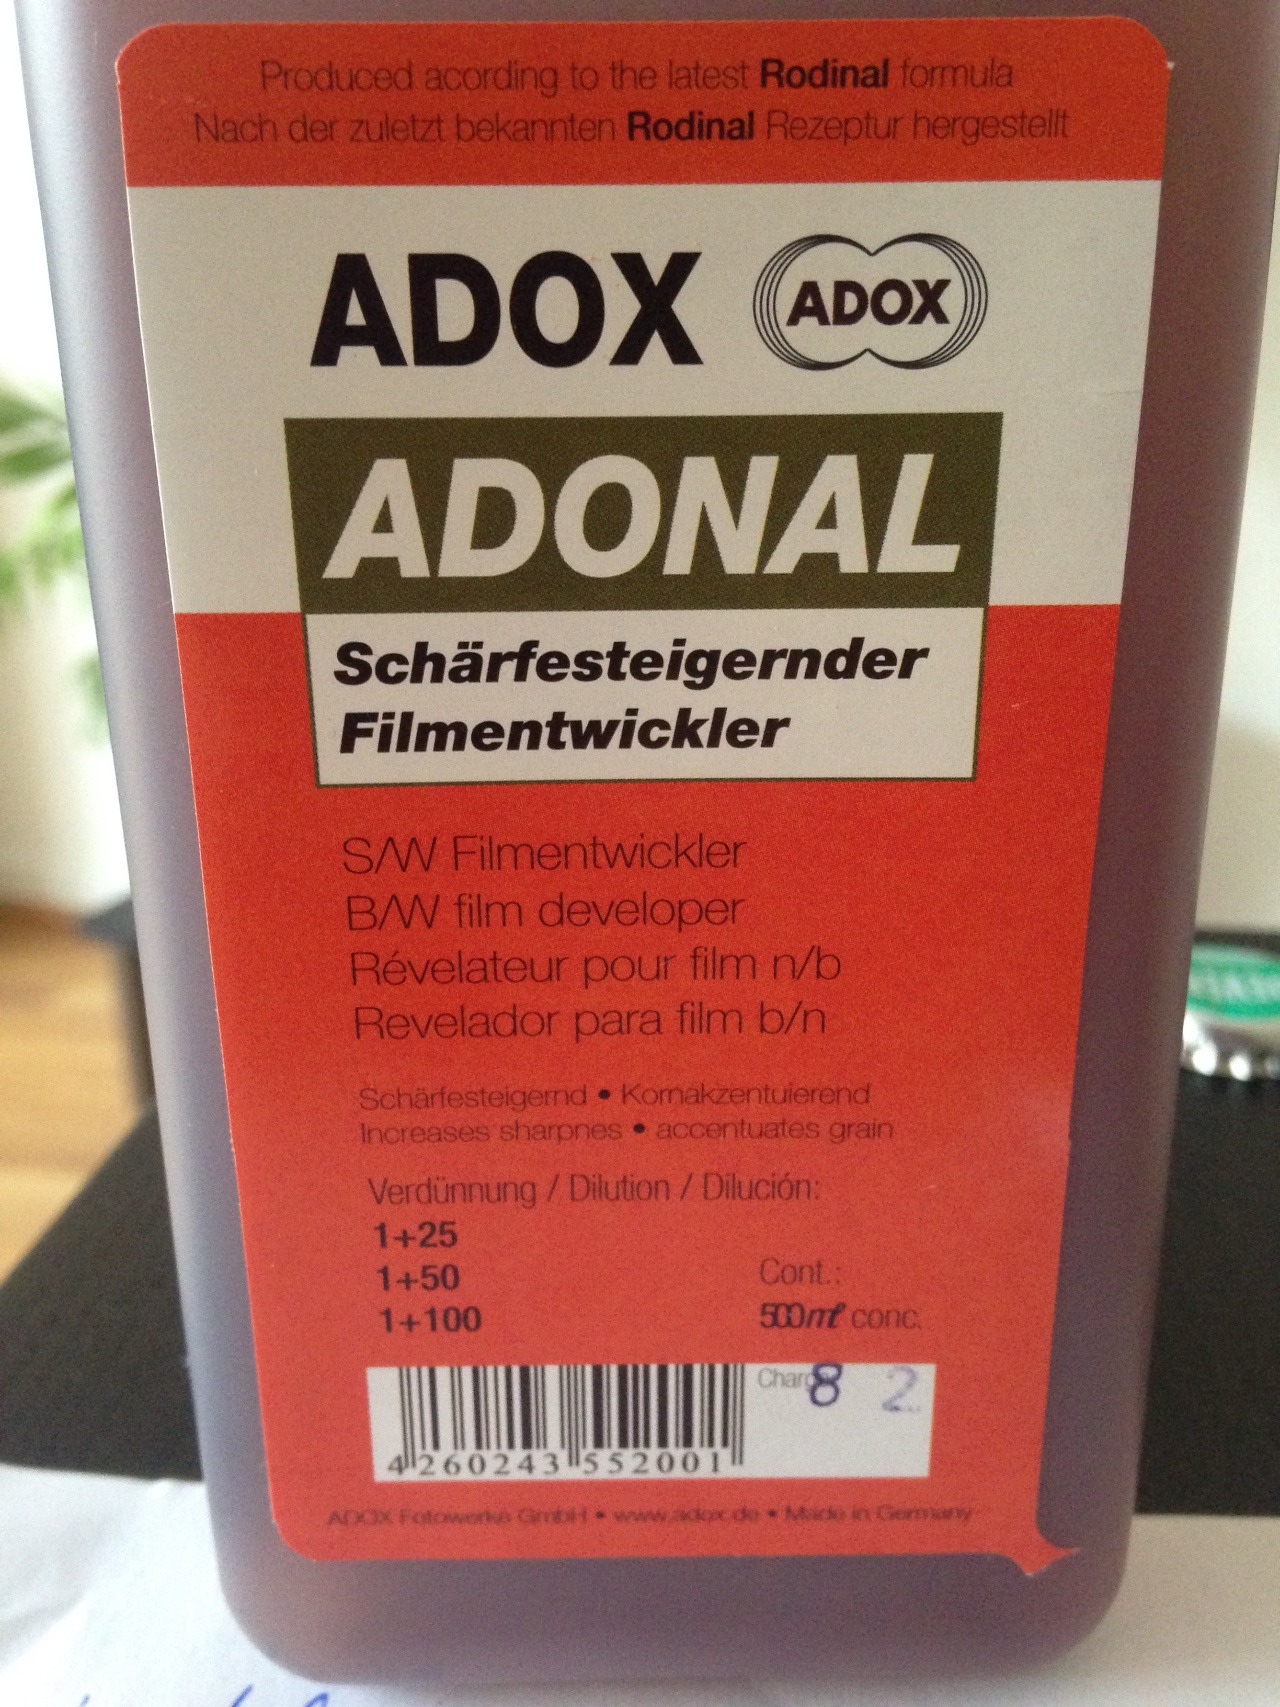
Developing it with the Rodinal-solution (Adox Adonal).
Stopping development with a stop bath.
Fixing the film (using a Adox Adofix solution).
Washing (and using Adox Adolfo wetting agent at the final rinse).
The Rodinal developer
For each process, I used a chemical solution, and all of them had to be tempered to roughly 20°C. It was a bit tedious to prepare all the solutions and especially maintaining them at 20°. But as I found out later, you probably don’t really need the chemicals for steps 2. and 4. And keeping all solutions at 20 degrees seems not to be too important, either. So next time, I’ll try without the chemicals for these steps and just use water.
And, what I should have done after washing (the last step), is wipe the whole film with a sponge to get rid of any remaining solution residues and also to get rid of the first few dust particles that might have already settle onto the film.
Then it was time for drying for which I just hung the strip over the bath tub.
On last word of caution: you should be aware that these chemicals are not harmless. I had a lightly irritated eye a bit later, probably from the solution fumes. So take care with those chemicals!
Watching football
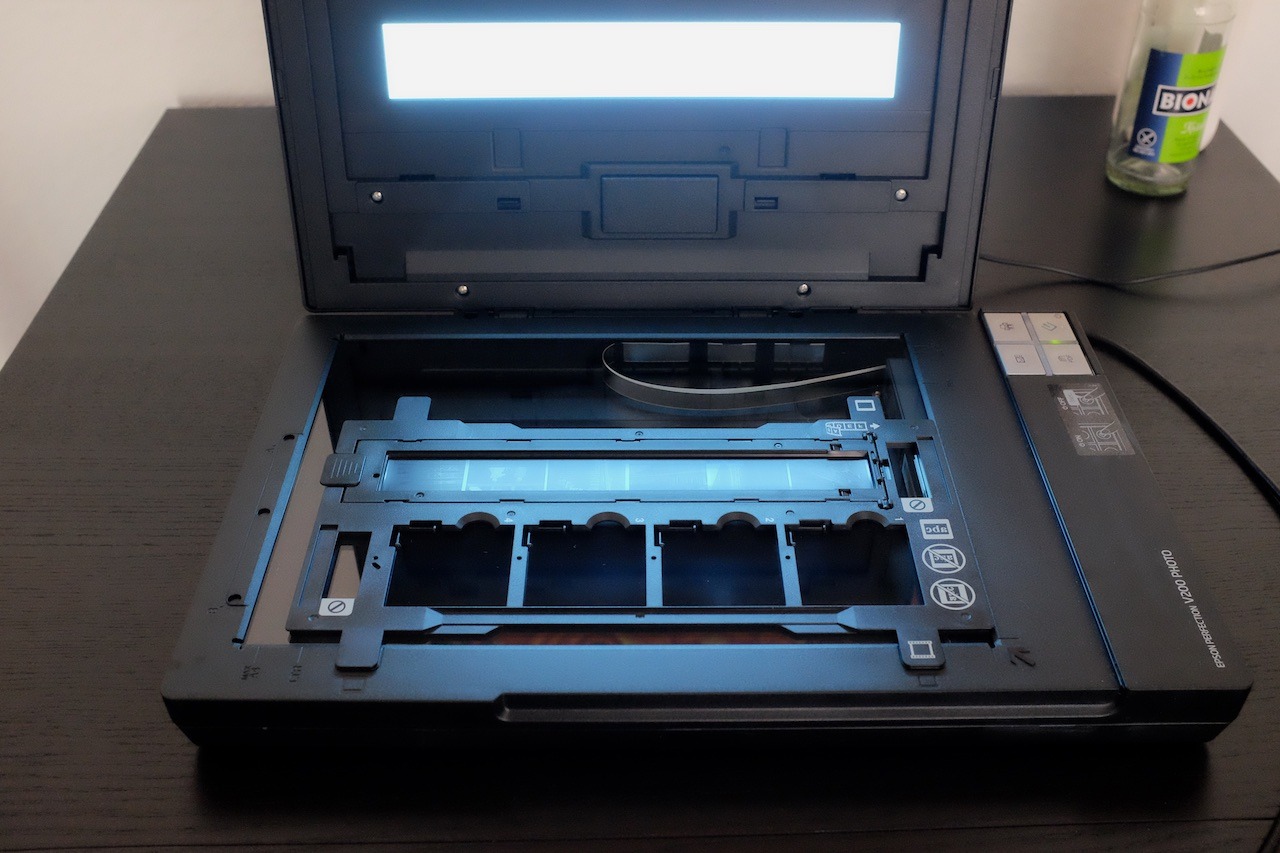
Scanning
To be able to scan the images, I had to cut the film-strip into sets of six images, so they fit into the scanner’s tray. Pretty easy. Just use regular scissors.
Scanning the negatives
The scanning itself was pretty straight forward, too. I used a Epson Perfection V200 Photo scanner. The Software – “Epson Scan” – automatically recognises the individual images and it’s just a matter of choosing the resolution and file-format you want. I chose JPEG with 600 dpi for a 10x15cm target format, which gives me 8.7 megapixel images.
What I can recommend – and what I didn’t do right from the beginning – is to examine the negatives once again before putting them into the scanner and wiping them with a dry and clean cloth. This should get rid of any new dust.
Here are two helpful resources for the scanning process:
Overall, it was not really difficult to develop the film. And next time I’ll probably be considerably faster, since I’ll be more familiar with the process, and – as I said – will skip preparing the stop-bath solution.
So, I’m going to do this again. Especially since I really enjoy the whole workflow.
It’s really different to shoot film. I tend to shoot more deliberate, and also pay more attention to composition right away. There’s the suspense having to wait for your photos and not knowing how they turned out. And in the end there are way less photos to edit. And, I think I end up with a much higher percentage of “keepers”. And of course, I like the look of film.
A while back, I started sharing my stuff more-or-less exclusively through my blog on my own domain.
I wanted to have a single web-presence where I can share all my content: be it photos, texts, videos, links or whatever else. I wanted to have control over how it’s displayed and where (the URLs of my own domain).
I think the trigger was my frustration with the fleetingness of corporate third-party services. They were (and are) getting neglected, moving in a direction I was not happy with, or getting acquired by Facebook, which I try to avoid as much as I can.
So, I thought, instead of putting a lot of work into sites that I can’t control, I’d rather put it into my own website on my own domain.
I just wanted something more reliable and permanent.
I still wanted to continue using these third-party services, though. I wanted my connections on these sites to be able to continue following me there. But I didn’t want to have to rely on these services as much as before. I wanted the canonical source of my content to be my blog.
So, I continued (and I am going to continue) posting copies of my content to Flickr, Twitter and all the other services that I use, but this posting happens automatically most of the time and always through my blog1.
And that’s why I was excited when I heard about the idea of the IndieWeb. I think I first heard it from Jeremy Keith at the Decentralize-Camp last year.
The best way to explain what it’s about, is to just quote their website:
What is the IndieWeb?
The IndieWeb is a people-focused alternative to the ‘corporate web’.
Your content is yours
When you post something on the web, it should belong to you, not a corporation. Too many companies have gone out of business and lost all of their users’ data. By joining the IndieWeb, your content stays yours and in your control.
You are better connected
Your articles and status messages can go to all services, not just one, allowing you to engage with everyone. Even replies and likes on other services can come back to your site so they’re all in one place.
You are in control
You can post anything you want, in any format you want, with no one monitoring you. In addition, you share simple readable links such as example.com/ideas. These links are permanent and will always work.
I’m now slowly but certainly moving more and more in that direction.
While I currently use Tumblr as my blogging platform – which hardly counts as an independent tool – I still think it is not that much of a contradiction to the IndieWeb principles. Tumblr allows you to host your blog on your own domain – and I believe that this is the main point of the IndieWeb. Whether you host the website yourself comes second, in my opinion. If Tumblr went away – or I wanted to move away from it – I could still switch to host my own site, but – crucially – I could keep all the URLs.
This whole approach has been serving me well for quite some time now. And I’ll continue refining the design of my blog to better cater for this style of sharing and to implement more of the IndieWeb building-blocks.
This is called POSSE (“Publish (on your) Own Site, Syndicate Elsewhere”) in IndieWeb terms, and I achieve this either via Tumblr’s sharing tools or IFTTT. ↩︎
I’m fifty days into my 365-days-project. Here are a few thoughts on it so far.
I’m taking way more photos
Since I’m carrying my X100s around my shoulder most of the time when I’m outside1, I’m taking way more photos than I used to. This results in being able to capture things and moments that I wasn’t able to photograph before – or was too lazy to do so.
The crucial bit really is to have the camera around my shoulder and being ready to take a photo any time.
I am carrying my iPhone and its camera with me all the time, too, but that’s always in my pocket and needs taking out. This seems like only a tiny hinderance for taking photos, but it really is way easier when you have a camera ready to go any second.
It might help me find my style
Another side-effect of taking more photos seems to be, that I’m becoming more aware of what I’m interested in with my photography. There already seem to be a few themes or projects naturally emerging, which is quite interesting.
It’s a great diary
Taking – and publishing – at least one photo every day really helps to remember what I did that day – or at least let’s me document a tiny detail/bit that interested me that day.
I often feel like time flies, and this project is a great tool to counter this feeling. And while sometimes my photos feel quite ordinary and unimportant on each day, I feel like in hindsight, it will proof to be a valuable record for me personally.
It’s going to be long!
It’s not all roses here, though. On quite a few days I have felt uninspired and halfhearted. It’s not always easy to produce an at least somewhat meaningful or beautiful photo every day for one year. But I think the effort is going to be worth it in hindsight and I’m looking forward to what lies ahead of me.