I’ve pretty much read and looked through this now. It’s a good book. It’s a mix of showing you techniques you can use on the street and introductions to photographers.
While the choice of photographers is a little iN-PUBLIC-biased (the author David Gibson is himself a member of this collective), I still enjoyed it a lot – especially for the introduction or re-introduction to great photographers and their different styles. Recommended!
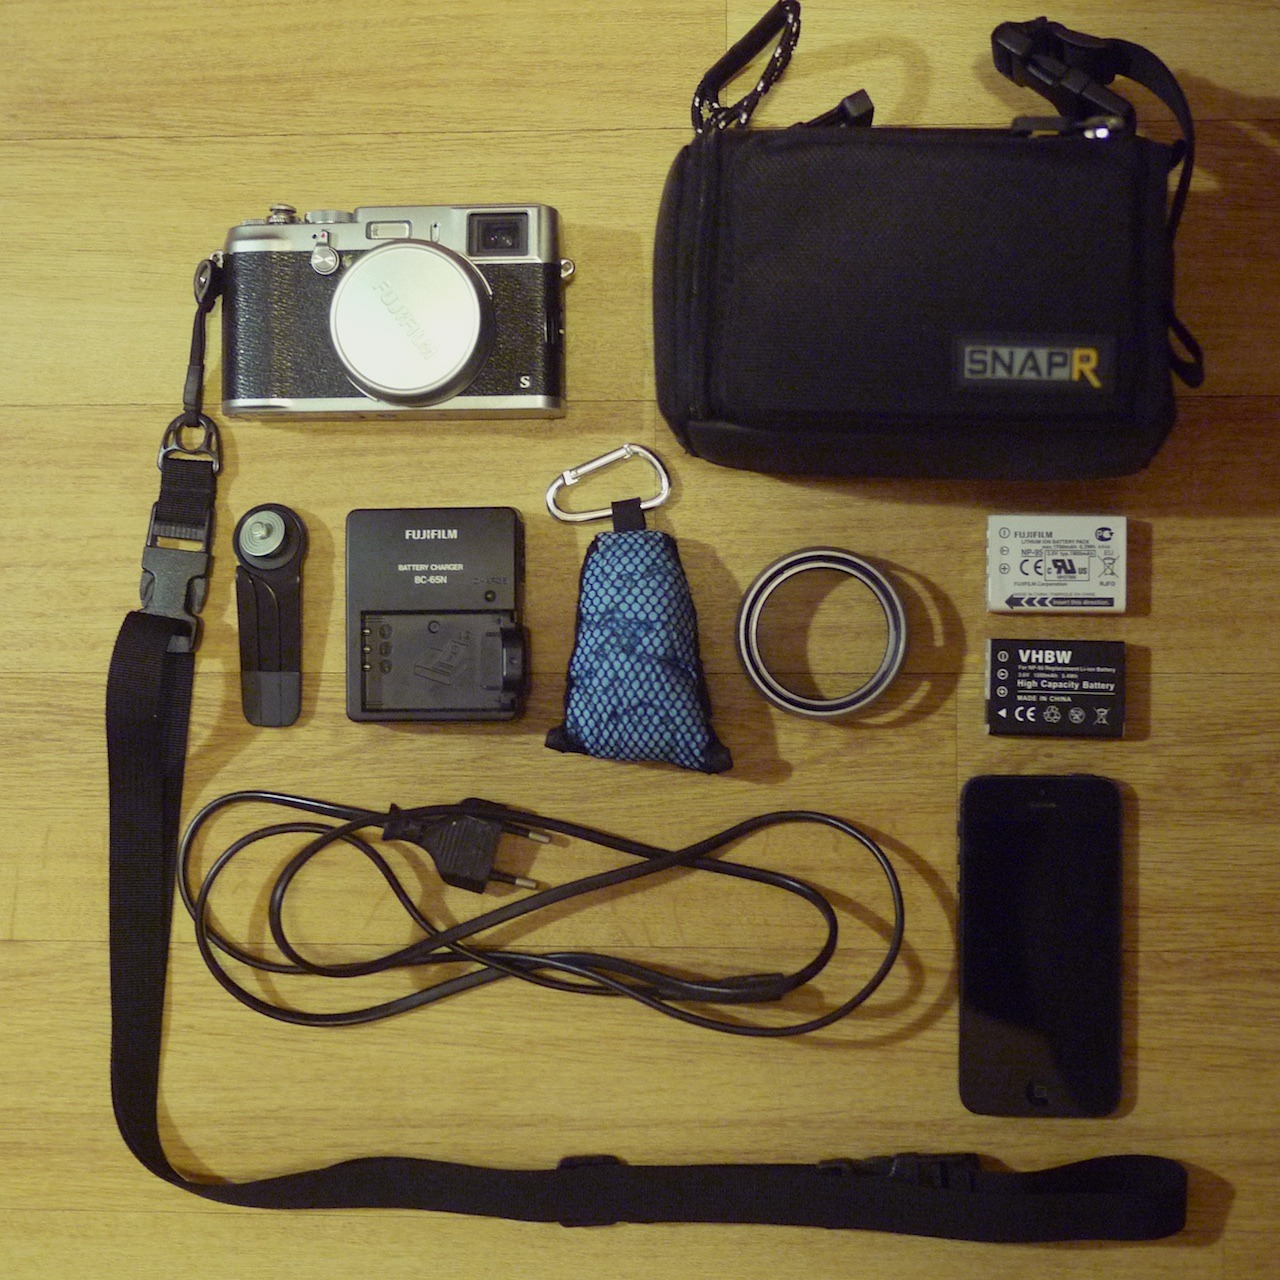
34/365: Travel photo gear. We’re busy packing for our short trip to the French alps. This is the photo gear I’m taking. I love this kit and how compact it is. It pretty much all fits into the SnapR bag. Here’s what’s included in detail:
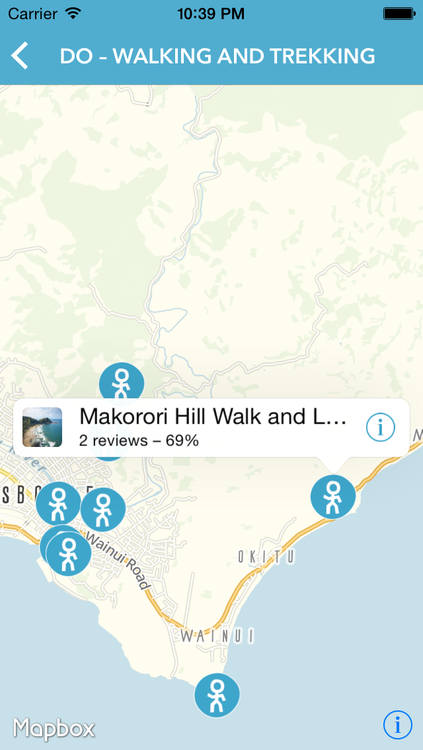
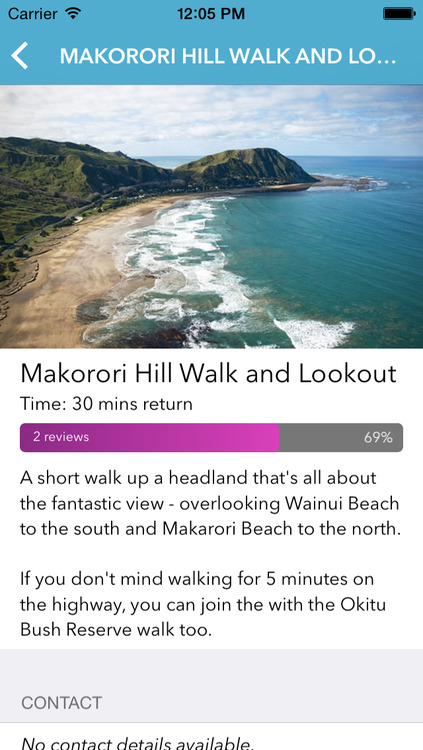
After 6 months of iterations and spending the preceding 2 months learning about Objective-C and Cocoa, I’m proud to have shipped my first iOS app: Out East, NZ.
It went live just before Christmas and it’s an universal app for iPhones, iPads and iPods.
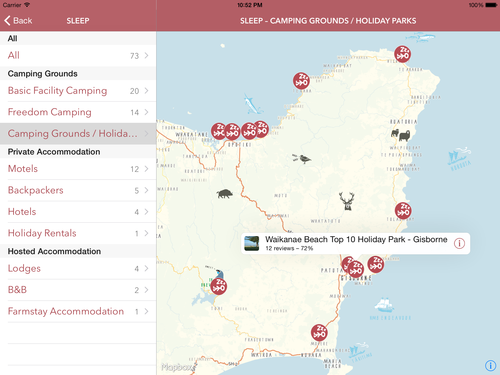
It’s a tourism app, where travellers can get infos and reviews on things to do and see, places to eat and sleep etc. for the Eastland region of New Zealand.
The app has been developed for Tourism Eastland in collaboration between myself, Cymen Crick and Mike Howe of Rankers and Aaron Innes of Broker Brothers.
It’s a great team. The others provided most of the requirements, the vision, the ideas and the design. They also provided great feedback along the way and made sure the actual data for this app was present and ready.
While I was involved in some of the things mentioned above, my main responsibility was all of the implementation: coding the actual iOS app in Objective-C and Cocoa, creating a custom map with TileMill, and writing the server-side API with Ruby and Rails. And it all had to be available offline (while still downloading updates from the server periodically).
It was a great and fun project to work on. I think mostly, because there was a great deal of respect and trust involved and I had lots of freedom to develop my own ideas and make my own suggestions. But also because the whole collaboration and communication was excellent. It was open, constructive and clear. And that’s not something I take for granted. It also proves that distributed teams can work very productively (not that I needed another proof): We had Cymen and Aaron in Gisborne on New Zealand’s North Island, Mike in Golden Bay on the South Island, and myself in Düsseldorf, Germany and everything was smoothly managed via Basecamp and Skype.
Despite being fun, it was also challenging. I had to learn so much new stuff (and I am still learning): Objective-C, Cocoa, additional libraries, developing a custom map, and all the tools involved – Xcode, TestFlight, provisioning profiles, iTunes Connect and the whole app-review thing, TileMill etc.
Sometimes – or maybe even often – it was really frustrating to implement even basic things, because everything was so new to me and I had to consult the documentation for every little bit. But it has nevertheless been a very rewarding and inspiring journey and it feels a lot less frustrating by now.
While we wish we had been able to include more features in this first version, everybody involved is still very happy with the end result.
There are basically two popular ways to sign and encrypt one’s email messages: S/MIME and PGP. I had a look at both and decided to start with S/MIME. But I may use PGP in the future, too, and use it alongside.
Using S/MIME (or PGP) gives me these two benefits:
I can sign all my emails, verifying that I am indeed the owner of the email address in the “From:” field.
I can encrypt my messages for the recipient, if I have stored his or her S/MIME certificate (once you receive a S/MIME-signed email, you have also obtained the correspondent’s certificate).
I chose S/MIME first, because it is way easier to use: it’s integrated into all or most popular email clients and so there’s no need to install any additional software. And you can continue to use your email clients of choice, even for encrypted messages.
Here are the few things I needed to do, in order to sign and encrypt my email messages on my Mac and my iPhone using S/MIME:
Opening and storing the certificate with my Mac’s Keychain Access. (At this point, my Mac was completely configured. From then on, Mail offered me to sign and encrypt my messages).
Exporting it from there as a password-protected .p12 file.
Copying it to the iPhone and installing it.
In the iPhone preferences under Mail > (Email Account) > Account > Advanced, I turned on “S/MIME” plus “Sign” and “Encrypt”.
While this only took me 15 minutes, I wish this process was more straightforward, so this would be more easily accessible to less computer-savvy people, too. But it’s definitely easier than setting up PGP.
A more detailed description on how to set up S/MIME on a Mac and iOS device can be found in the article “How to secure your e-mail under Mac OS X and iOS 5 with S/MIME” on ars technica.
At last, here are some more links on the topic, that I find useful:
Imagine you have friends over for dinner. You’re cooking.
Everything is going to plan. There are just a few minor issues: the Mise en place is taking a little longer than expected, the sauce will just not reduce as quickly as you’d like. But you still manage to plate up — maybe not quite at the time you originally wanted to, but still early enough, so no-one got impatient.
You are having a great evening. Everyone tells you it’s delicious. One person needed to sprinkle some extra salt on their dish. But that’s ok. Tastes are different.
Now the party is over. Your friends left.
You’re very happy with the evening and the food you have cooked.
But you’re not quite done yet, unfortunately. The kitchen is a mess. All these peels are still lying around. There are dirty dishes and equipment everywhere.
If you’re planning to cook in your kitchen ever again, you should better clean up. And you better do it right now. Otherwise it’s going to smell, and it’ll be much harder to wash up. And who would want to deal with a dirty kitchen anyway, where you’d have to move things out of the way or clean up first, right before you can cook your next meal?
Of course, the kitchen won’t look that messy each time you cook. You’ll sometimes manage to clean up in between the cooking, because you have enough time, it’s a simple dish or one you’re comfortable with, or you just got more organised and experienced.
But the bottom line is: the kitchen needs to be clean in the end.
As the Mac turns 30, I realised that I’ve been using Macs for 10 years myself now.
“The Switch” started in 2003 — during the end of my apprenticeship — when a colleague regularly brought his personal 12-inch PowerBook G4 to the office. It caught my attention, and I spend quite a bit of time learning about his computer. He was happy to tell me all about it — and Apple in general, too.
I ended up buying this very PowerBook from him at the beginning of 2004. I’ve been using Macs ever since, and I haven’t looked back.
The Mac and Mac OS X felt like the sweet spot to me. It seemed to be like a merger of the good bits of Windows and Linux with an extra dose of taste, logic and fun on top.
Over the years, I’ve owned 3 Macs:
A 12-inch PowerBook G4. Bought used at the beginning of 2004 — sold again September 2004, to buy
I’ve used three more Macs given to me at my workplace: a 2009 21.5-inch iMac, a 2009 (or 2010) MacBook Pro 15-inch, and a 2011 MacBook Air 13-inch.
All the Macs I’ve used have been fantastic machines. And they just keep getting better with every generation.
So, happy birthday, Mac!
If you hadn’t been created, I’d be using a different computer and I wouldn’t even miss you.
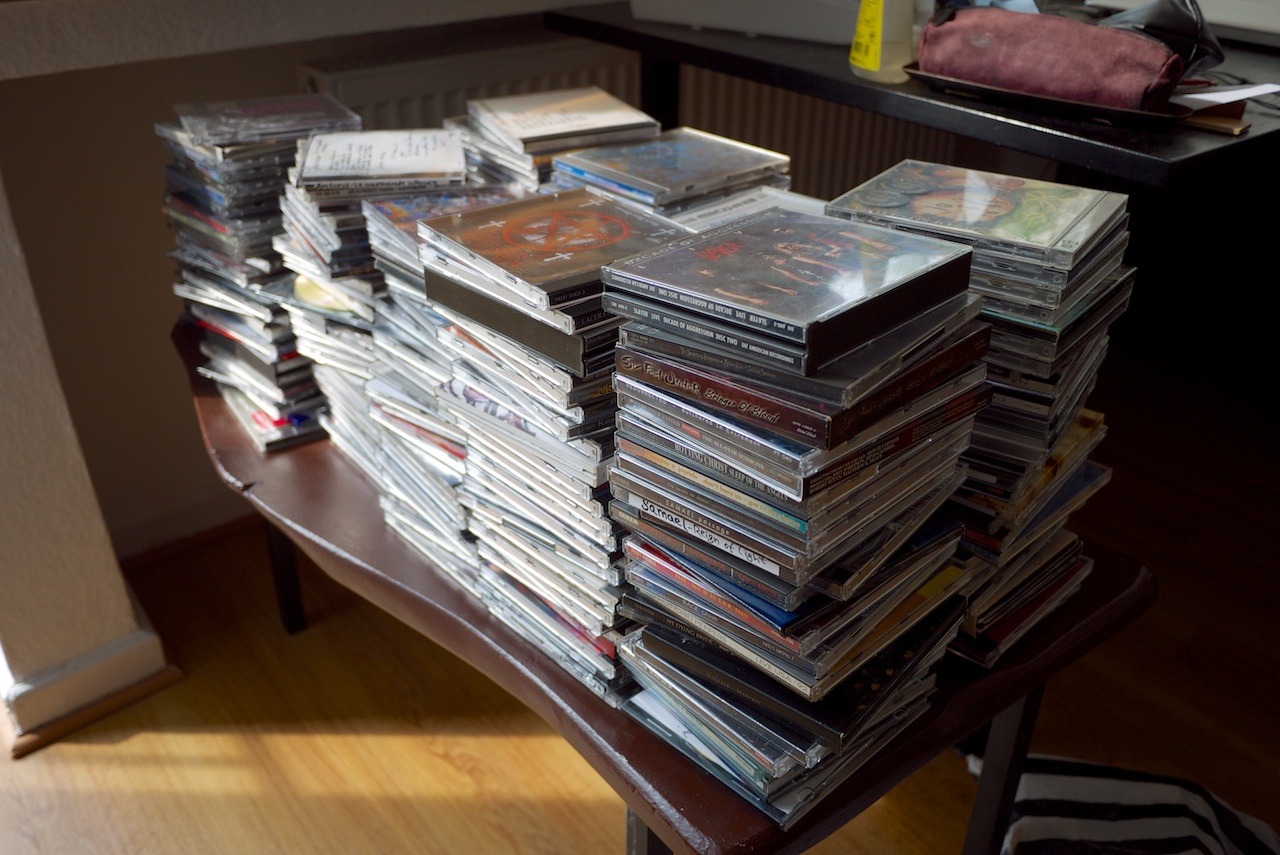
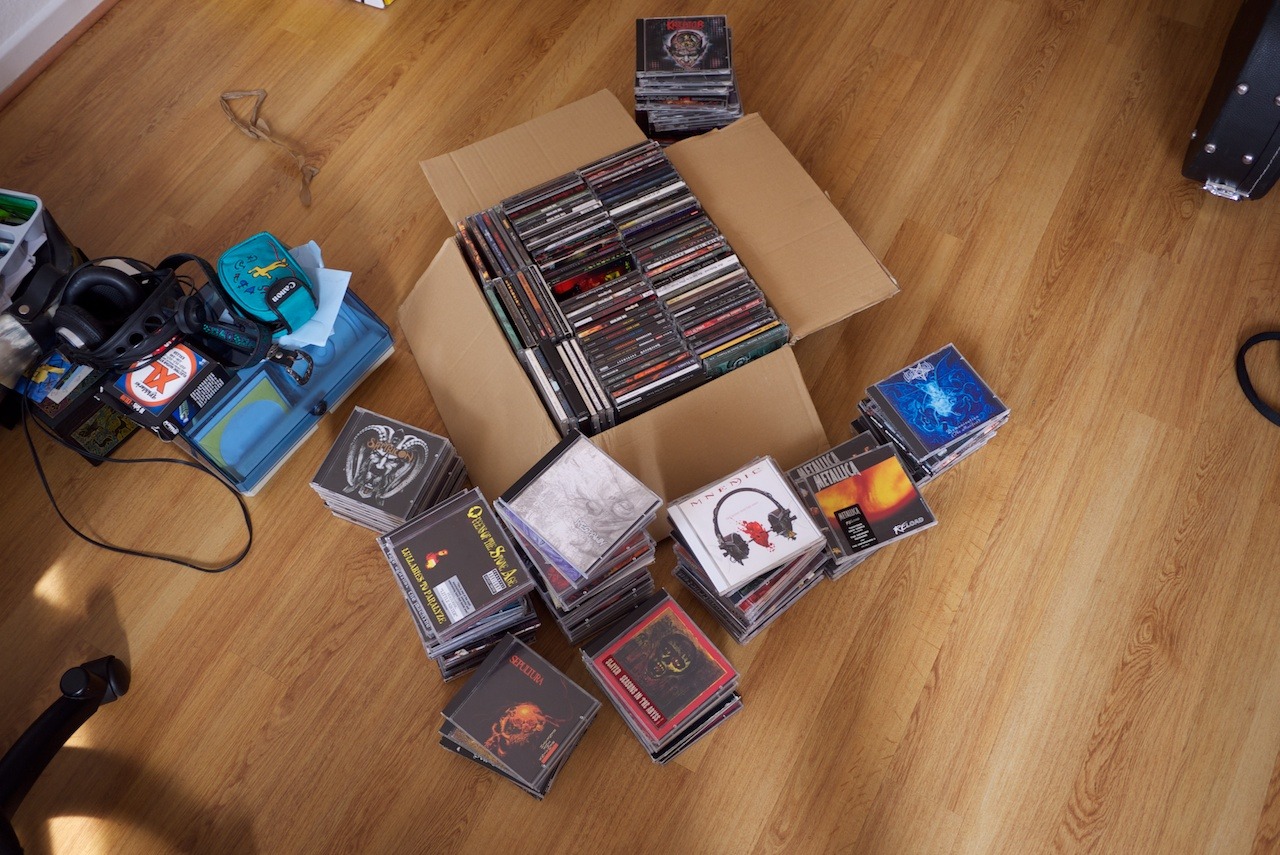
These photos were taken during my CD import- and archive-session a while back. It was time to copy the music from all the CDs onto my hard-drive that I didn’t import before we left for Australia and New Zealand.
Since we left, we haven’t been listening to CDs any more. So, it was only logical to import the rest and archive all these disks. It’s all in iTunes and on Rdio.
The CDs are now stored in the basement. We sometimes get some of them for the car.
Pile of CDs queued for importing.Bye bye old disks - ancient holders of our music.
After coming back from Rome, I had a problem. I enjoyed shooting with the Nikon FE film camera so much, that I wanted a digital camera that more closely replicates this experience than my GF1.
I wanted a more classic experience: an aperture ring on the lens, a shutter speed dial, a direct control for exposure compensation, a (optical) viewfinder, good manual focus. And more. And all of that in a compact package, not much larger than the GF1, if possible.
I didn’t have to look around much. There’s only one company right now that makes these sort of cameras: Fuji with its X-System.
So, I began reading articles and reviews about these cameras. Quickly, I got pretty excited about these cameras and couldn’t stop researching. DPreview and Thomas Menk’s blog were my starting points. And from there, I found an endless stream of articles and videos praising the Fuji cameras and their lenses.
After almost three weeks of obsession and hesitation, I ordered a new X100s via eBay last Friday.
While the X100s is apparently not perfect in all regards, it still ticks a lot of boxes for what I think makes a good camera for me: In addition to the classic controls, there’s the hybrid viewfinder, a great sensor with high dynamic range and low noise, a fast high-quality prime lens and it’s dead silent and small — to name a few.
I had some doubts getting a camera with a fixed 35mm-equivalent prime lens. But then again, the vast majority of photos I took with the GF1 in the last three years were with either the 28mm-equivalent or 40mm-equivalent primes. So I think this one lens will fit my shooting style quite well. For at least 95% of the time anyway.
At the beginning of December, Nicole and I went to Rome for a week. I took with me my Nikon FE film camera with 50mm lens and two black and white films. And I had a blast shooting with it.
It was not the only photographic equipment I brought along, of course. I also packed my trusty GF1 plus a few prime lenses. And I still shot more photos with the digital equipment. But it was the 30-year-old, simple film camera that I enjoyed way more. I didn’t really expect this and ended up shooting more than I originally planned to. So I had to buy one more (colour) film while we were there.
Been here for lunch. This was our waiter.
When I was out with the Nikon, I didn’t bring my GF1 and vice versa.
What made me like this setup so much, was a combination of its controls, the limitation of a single lens, the fact that it is a film camera, and its overall simplicity.
The controls are just fantastic. Instead of a mode-dial, which almost all modern cameras have, it has an aperture ring on the lens as well as a focus ring, a shutter-speed dial and a direct control to set the exposure compensation. That’s it. You can look at the top of the camera and can immediately see what its settings are. And — more importantly — you can set all the controls directly without looking at a screen and fiddling with tiny buttons. I really wonder why almost all cameras these days have a mode-dial, especially with enthusiast and pro models. I think, it’s wonderfully intuitive to set your camera with these old-school controls. It’s all you need, really.
I learned to love a manual lens on my GF1. But the 50mm lens translates to a 100mm equivalent on Micro Four-Thirds, which just isn’t that practical for me most of the time.
Another thing I noticed was, that I really like looking through a viewfinder. I missed this with my GF1, but it was while shooting with the FE, that I noticed just how much. I don’t know exactly why, but it feels different than composing via a screen. When you lift the camera to your eye and look at the actual world through an optical viewfinder, there’s a different connection to the world around you.
The constraints of this setup — shooting film and having one specific film loaded at a time, plus having a single focal length lens — really made me think more about what to photograph and how to photograph it. I was way more careful with composition. And at the same time it was very liberating not having to think so much about the settings or what lens to use. That was the setup and I had to cope with it. There was more focus on shooting than anything else.
When I was back, it was quite exciting for me to wait for the results. Having only shot one film with the camera before, I wasn’t even confident that the three films I shot turned out ok at all.
But they did. And they look quite different to digital — in a good way.
Apart from the photos showing the cameras, all the photos were taken with a Nikon FE with 50mm E Series lens and Fuji Neopan 400 (b&w), Kodak Tri-X 400 (b&w) or Kodak GB 200 Gold (colour) films.
Apart from occasional cropping and/or straightening, these photos are not post-processed and are displayed how I got them from the photo-lab.
I went with option 1: installing a Samsung 250 GB EVO SSD in place of my existing 500 GB HDD and replacing the DVD-drive with the Hardwrk-Kit plus the 500 GB HDD.
Feedback from a few people helped me making the decision. All of them are running a similar setup — or pretty much the same even. All of them are very happy with it and haven’t had any problems.
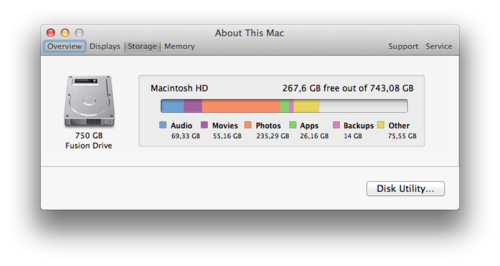
Here’s what the storage allocation now looks like:
And here are the steps I’ve taken:
Making sure that the drive containing my Time Machine backups is working normally and data is readable.
Backing up the most important data on an additional HDD. Just in case. (I also had a third backup: at Backblaze.)
The disassembling and reassembling of the hardware turned out to be easy. The manuals are very detailed and the hardware is laid out pretty obviously anyway.
I’ve used the setup for a day now, and everything’s running smoothly and really fast. Happy, happy, joy, joy.
I’m planning to upgrade my 2011 15” MacBook Pro’s hard drive with an SSD. Currently I’m still running on a 5400rpm 500 GB HDD. When I ordered the Mac two years ago, I intentionally went with the cheapest HDD option – this one – with the plan to upgrade it with an SSD setup 1.5–2 years later when SSD prices have come down. It’s now 2.5 years later and I’m finally looking at some options.
The current situation
I’m primarily looking for the performance increase in the upgrade. But I’m also going to run out of HDD space fairly soon, and it would be nice to still be able to fit all my data on that one machine after the upgrade.
Out of the 500 GB I currently have, most of it is occupied by my photos and movies in the Aperture library. The library is currently taking up 275 GB. I would only need fast access to the more recent photos – not further back than one year. The rest is merely an archive.
My iTunes library is another 55 GB that doesn’t need SSD-grade speed.
So most of these files could live on a/the good old spinning hard drive without a problem. But I’d definitly want to keep my music available on the MacBook’s internal hard drive. I need my music with me at all times.
Here’s what my current storage allocation looks like:
The options
To keep all my data on the MacBook, I’d have to increase the disk space to at least 750 GB. I think this amount would easily last me for the next few years.
Here are the options I am considering, ordered from cheapest to most expensive:
(A fifth option would be to get a 500 GB SSD and the Hardwrk Kit to have a 1TB Fusion Drive internally. But price-wise this is pretty close to option 4, which I would chose over this option anyway.)
The most affordable solution. The Hardwrk Kit replaces the DVD drive with an adapter that can house another drive – HDD or SSD. It also comes with a enclosure for the DVD drive, so you can still use the drive via USB.
I don’t care much for having a DVD drive internally. So making that external via the Hardwrk Kit is perfectly acceptable to me. The only downside would be, that I’d need to take that component apart as well.
Costs: ~ 230 EUR (150 EUR for the SSD, 80 EUR for the Hardwrk Kit)
Disk space: 750 GB, all internally.
Pros: Affordable, enough space, good to great performance increase, good use of existing HDD.
Cons: Performance not as good as a pure SSD setup, more effort installing since I need to replace the DVD drive.
Option 2
The same setup as option 1, but with a more performant SSD.
Costs: ~ 280 EUR (200 EUR for the SSD, 80 EUR for the Hardwrk Kit)
Disk Space: 750 GB, all internally.
Pros: Quite affordable, enough space, good to great performance increase, good use of existing HDD.
Cons: Performance not as good as a pure SSD setup, more effort installing since I need to replace the DVD drive. Not quite as affordable as option 1.
Option 3
Internally, a pure SSD setup. The existing HDD would be put in an external USB enclosure to hold additional data.
Costs: ~ 300 EUR for the SSD.
Disk space: 1 TB, 500 GB internally on the SSD, 500 GB externally on the HDD.
Pros: Great performance increase, price ok, somewhat good use of existing HDD, no messing with the DVD bay.
Cons: Not all data on the MacBook. I would need to start manually relocating parts of the Aperture library onto the external drive and keep managing this.
Option 4
The most expensive option, but certainly the one I’d prefer, if I left costs out of the equation.
Costs: ~ 410 EUR for the SSD.
Disk space: 750 GB SSD-only storage, all internally.
Pros: Great performance increase. Enough space for all my data on the SSD, no messing with the DVD drive bay.
Cons: Expensive, no really good use of the existing HDD.
Decisions, decisions
Option 4 would certainly be the best one performance- and convenience-wise. Also, it might be the most future-proof and least error-prone solution. But is it really necessary to have all my data on an SSD at all times?
FusionDrive seems to work quite nicely and options 1 and 2 would give me the necessary speed plus big storage capacity without having to manage it manually, either. Especially option 1 seems to be great value for money.
I’m least convinced with option 3. Mostly because it means I’d need to start managing data on an external drive in addition to the data on the MacBook.
So, we’ll see. I guess I have to sleep on it for another night or two.
It’s not so obvious, or is it?
I have been really bad at bookmarking stuff I’ve seen online. And although I was already using a great bookmarking service, it has turned out to be too hard to manage and keep up to date.
It happened quite regularly that I wanted to find an article, photo or other resource again, but couldn’t remember where I’ve seen and “liked”, “faved” or “starred” it previously. And so, I often needed to turn to Google Search to find what I’m looking for. This search was sometimes successful, and often not. And of course, it was tedious having to go through a whole lot of search results.
I needed to fix this.
I needed a master-archive for all the things I looked at on the internet.
Pinboard has build-in support to do this with my Twitter Favorites and Instapaper can send Likes to Pinboard directly.
For the rest, I started using IFTTT and have become a big fan. I am using recipes to import my Tumblr Likes, Google Reader Stars, Instagram Likes, Flickr Favorites and Vimeo Likes. (Unfortunately, Github and StackOverflow Stars are not supported.)
Using IFTTT to automatically create Pinboard bookmarks for all my Likes, Stars and Favs has made it a lot easier for me to find things again that I’ve seen in the past.
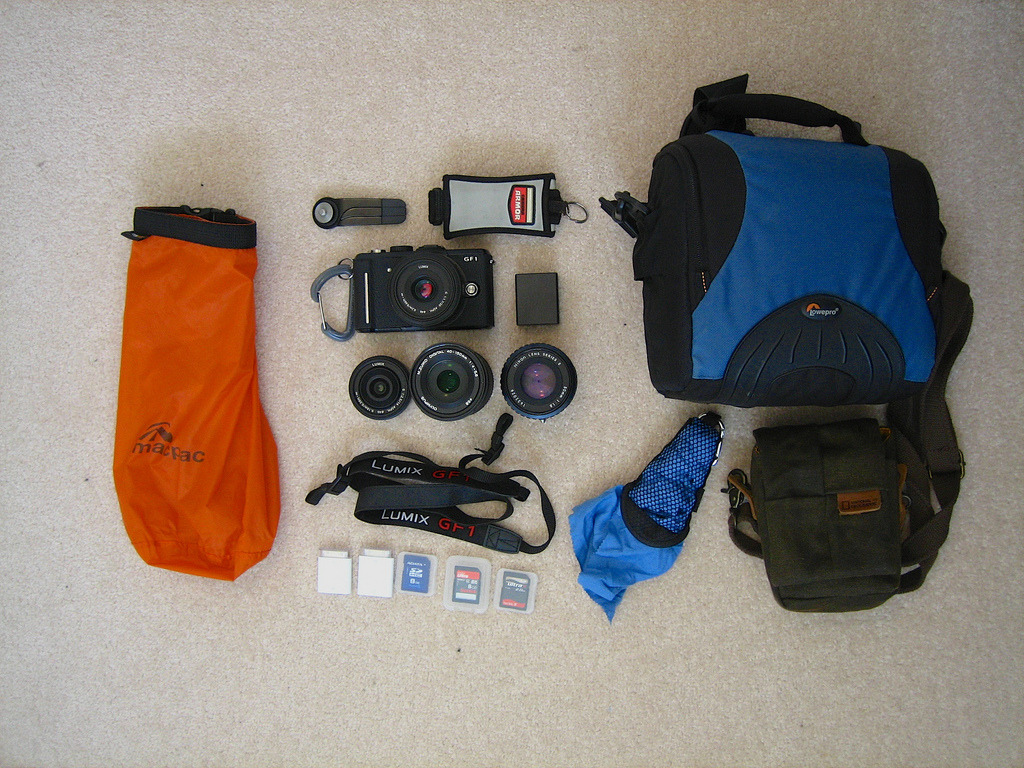
Travel Photo Gear
We are leaving New Zealand and it’s time for a few months of travelling before we will be back in Germany.
We’re going to travel through South-East Asia: Singapore, Malaysia/Borneo, Thailand, Laos and Cambodia.
This is what I’m going to take (cables and charger not shown).
Panasonic GF1 and 20mm f/1.7 pancake. Love this cam, especially in this combination: light, bright, great quality, small and unobtrusive.
14mm f/2.5 pancake wide-angle lens. Another great micro four-thirds lens. It’s only 50g.
Olympus 40-150mm f/4-5.6. Tele zoom. Just bought it. Will probably be used for birds, Urang-Utans and other wildlife.
Nikon 50mm f/1.8 E pancake with micro four-thirds adapter. Bright medium tele.
Joby GorillaPod Micro800. Super small and lightweight tripod. Just bought it, so I’ll find out if it’s as good and appropriate as I expect it to be.
Hand strap for more secure handling while shooting.
Spare battery.
Shoulder strap. Always handy and an alternative to the carabiner.
Small drybag. Keeps everything 100% dry, even in the wettest of conditions.
Apple camera connection kit. That’s how the photos get from the cam onto my iPad 1.
A couple of SD cards.
Small travel towel. Because the gear is going to get wet and needs to become dry again.
Small bag. Fits the cam + small lens and a few accessories. For a lightweight trip and protection when throwing the cam into a backpack.
“Big” bag. Fits all my gear. Handy for bigger and/or longer trips. Keeps everything in one place.
Nicole and I are going to leave New Zealand on October 23rd. We’ve been travelling and living in NZ for four years and we feel like having a change and see family and old friends again.
We will be travelling through South-East Asia for a couple of months before returning to Düsseldorf, Germany some time early next year.
We have had the most amazing four years here and we are definitely going to miss New Zealand.
I love seeing people use the software I produced. I love immediate and direct feedback. It’s very satisfying to see how a certain feature makes someone else’s live easier.
This is why I enjoy writing company-internal software tools, for example. I can work with the users to create and improve the application. I can see my colleagues use it and can get feedback right away.
When the feedback is negative, I can usually fix it pretty quickly. And, it’s interesting to learn why a certain feature was unclear to them or not that great in the first place. When it’s positive, well, it just makes me happy and gives me confirmation.
Being in the same room gives me the ability to watch over their shoulders from time to time. And when I do, I almost always notice something that I can improve or add, to make their jobs less tedious. Sometimes, even trivial tweaks can go a long way.
This direct connection makes it fun and very efficient to create and improve software.
Unfortunately, this direct connection has always been missing when I was working on the software my company actually sold. So far, customer feedback was usually brief, generic and indirect. And I have never seen a single one of our customers use the software we produced.


